Monday 5 November 2012

Turquoise White Art Deco Bridal Hair Comb Batik Kanzashi

I REALLY love the art deco color palette! I can't get enough of it :) This time for BRIDAL HAIR COMB I chose turquoise (which has more green, I think) hand-dyed batik which I combined with white satin to create layered petals of ume flowers. The flowers are. decorated with white pearled stamens, filigree and crystals.


To purchase, please follow this link to my Etsy shop. Feel free to drop me a comment ^_^

Thursday 1 November 2012

Yellow Ume Flower Batik Kanzashi Hair Clip

Actually I am still confused between sakura and ume flowers..hahaha.. I tried to make an ume flower kanzashi and I hope I did it justice. I chose to combine hand-dyed yellow batik and dark green satin (polyester) and studded the flower and leaves with yellow swarovski crystals.


This item is avaliable on my Etsy shop. To find out more, please click HERE.

Blue White Art Deco Bridal Peony Batik Kanzashi Hair Clip

I hope you don't get bored with peonies :-).. I love making peony kanzashi and I love art deco color shades :-). A new item on my Etsy shop is a peony :-)

I used hand-dyed blue-grey batik and combined it with white satin. I decorated the flower with black pear stamens. I was going to use white but they wouldn't stand out. It is mounted on an alligator clip about 5 cm long.


I hope the flower doesn't look too gloomy :D..

To find out more, click HERE.. Thank you

Wednesday 31 October 2012

Lavender Cerise Peony Batik Kanzashi French Barette

My second peony is on my Etsy shop :-)

I combined hand-dyed lavender batik and cerise satin (polyester). Both make each other stand out. For the leaves, I used hand-dyed green batik. This peony is quite big so I mounted it on an 8-cm french barette.


Please click here for more information and purchase.

I'd love to get some comments and feedback, so feel free to do so ^o^.

Sunday 28 October 2012

Hair Accessory Alligator Hair Clip with Pink Peony ピンクのボタンのヘアアクセサリー

Peony or  ボタン in Europe is called "the rose without thorns". In Japan and China it is considered the "King of flowers".

ボタンはヨーロッパでは"トゲのないバラ"と呼ばれます。日本や中国では"花の王様"と考えられているそうです。

The name itself derived from Paeon or Paean. He was the student of Asclepius, the god of medicine in Greek mithology.


Peonyの名前はペオニアから来ています。彼はギリシャ神話の中の薬の神であるアスクレーピオスの弟子でした。


Legend has it that Asclepius was jealous of his student. To save him, Zeus turned Paeon into the peony flower. Although there's another version that says Paeon received the peony from the mother of Apollo.

伝説では、こうなっています。アスクレーピオスは弟子の才能を妬みました。彼を守るため、ゼウスはペオニアをボタンに変えました。別の伝説では、ペオニアはアポロの母からボタンをもらったことになっています。

In China where the flower is originated, peony represents the royal families. Legend has it that queen Mu threw a party in the capital city of Jang-Ahn. Showing off her authority, she ordered all the flowers to bloom at the same time in order to make her happy. Although all the flowers obeyed, the peony didn't. The Queen was so angry that she had it sent away to the country side called NakYang. As soon as the peony arrived in NakYang, it bloomed even more beautifully. When the Queen heard this she was enraged and ordered that the peony had to be burned. Peculiarly even after burning, the peony still bloomed.

ボタンの原産地と考えられる中国では、ボタンは王族を表現します。こういう伝説があります。唐の則天武后が長安の都で宴会を催しました。彼女の威光を示すため、彼女は全ての花に同時に咲いて、彼女を喜ばすように命じました。全ての花はその命令に従ったのですが、ボタンだけはそうしませんでした。則天武后は激怒してその花を洛陽へと追放しました。ボタンは洛陽へ着くと、都にいた時よりももっと美しい花を咲かせました。則天武后はこの話を聞いてさらに怒り狂い、全てのボタンを焼き払うように命じました。しかし焼かれているにもかかわらず、ボタンは美しく咲き続けたそうです。

Having such a long history, it is no wonder that the peony bears so many symbolic meanings. In China and Japan, it has pretty much the same, it symbolizes a symbol of wealth, good fortune and prosperity and a happy marriage too.

このような長い歴史を持つボタンには、様々な象徴的な意味が込められています。中国や日本では割と似通っていて、ボタンは、富、幸運、成功、幸せな結婚を象徴しています。

Despite these myths and symbolic meanings, no one would doubt that the beauty of peony makes this flower one of the most exquisite flowers.

これらの伝説や象徴的な意味を知らなくても、ボタンの美しさがこの花を最も優雅な花の一つにしていることを疑う人はいません。

This is the first peony kanzashi I've made. It is made from hand-stamped batik. Pink for the petals and green for the leaves. I used the Japanese method of tsumami kanzashi to assemble the petals. It is mounted on this beautifully-carved metal alligator hair clip. I added tiny swarovski crystals as if the petals were studded with dew.

これは私の最初のボタンのかんざしです。ハンドスタンプのバティックから作りました。花びらを組み合わせるのに、日本の伝統的なつまみかんざしの技法を使いました。それを美しい装飾の入ったヘアクリップの上に載せました。スワロフスキーを使ってまるで水滴が付いているかのように装飾してみました。


To know more and to purchase, click the link to my Etsy shop here.

詳細はこちらのEtsyショップまで。

I'd be happy to hear about your comments on my work. Thank you ^^

ぜひ感想を聞かせてくださいね!

Saturday 27 October 2012

Orange Green Chrysanthemum Batik Bridal Kanzashi Hair Comb オレンジとグリーンの菊風のブライダル用バティックかんざし

A new label in my blog and also a new section in my shop.

新シリーズのスタートです!

This is my first successful attempt in making kanzashi using batik and Japanese traditional method. I wish I could go on and on telling about how I ended up making kanzash. But I will do it later on.

これは私なりにバティックと日本の伝統技法を組み合わせた最初の作品です。どうやって作ったかは後ほど解説したいと思います。

This kanzashi is made from hand-stamped batik from Java. I used Japanese traditional method when making it. It took me about 2 days to complete as nori or rice glue takes a long time to set.

このかんざしはジャワのハンド・スタンプのバティックを使って作りました。それに日本のかんざし作りの技法を応用しました。のりが乾くのに時間がかかったのでだいたい二日で仕上がりました。

This kanzashi is available on my Etsy shop.

このかんざしは、Etsyでお求めになれます。


Brides don't need to always wear white all the way, right? ;-) Bring vivacity in the joyous occasion with vibrant colors of hair ornaments such as this.

花嫁さんはいつも白づくめというわけではありませんよね?楽しい時には、明るい感じのヘアアクセサリーもぴったりだと思います。

You can check out my work HERE

詳細はこちらです。

In the meantime, I'd love to receive comments/feedback. Please feel free to do so. Thanks a lot!! xxx

コメントやフィードバックは大歓迎です!

First post in 3 months 三ヶ月振りの更新です!

I'm so sorry for not posting anything on my blog for over 3 months... I didn't write anything at all since 13th of July. I've just checked that my last post was on 12th of July..

三ヶ月以上、記事をアップしていませんでした。ごめんなさい。7月13日以来ですね。最後の記事は7月12日となっています。

I've immersed myself in sewing intensively - I've been spending  almost all day everyday cooped up in a room now changed into my atelier. Aside from sewing, I recently discovered a new passion: making kanzashi. And for these two reasons I decided to reform the content of my Etsy shop. The shop is called Jagatara Art handmade batik clothes and ornaments.

この間私はずっと、洋裁に集中していました。毎日のほとんどの時間を洋裁に費やしていたものですから、うちの家の一室は完全にアトリエと化してしまいました。さらに私は最近、新しい興味の対象を見つけました。それは、かんざし作りです。そんなわけで私はEtsyのショップの中身を作り変えることにしました。名前も、"Jagatara Art handmade batik clothes "に変更しました。

The reason for the change was that I wanted to sell the items that I make by myself. I wanted to have some sort of control over what I sell. And the only thing I could achieve that is by making the items by myself. I could decide the colors, shape, quality, etc. Although not all the stuff I sell is made by me. The shawls and scarfs are still made by my partner workshop in Java. They also provide me with batik cotton that I use to make handmade clothes and kanzashi.

そのわけは、私は自分の手作りのものを販売したかったからです。自分で工夫できるものです。そして何よりも、それが私が作ったものであること。私は、色や、形や、品質を、自分で決めることが出来ます。ショールやスカーフは確かにジャワの私の友達が作ったものですけれども、彼らは品質の高い綿のバティックもくれたので、それを使って手作りの服やかんざしを作ってみることにしました。

This is the cover of my Etsy shop and my Facebook fanpage now. I made the chrysanthemum on the photo. It was probably the first successful kanzashi I'd made :) It was made from hand-stamped batik and decorated with chirimen cover button. I was very proud that the chrysanthemum attracted a customer's attention who immediately wanted it so much.

これはEtsyとFacebookのファンページの扉です。菊のかんざしは私が作りました。多分うまくいった最初の作品なのですが、すぐにお客様の興味を引いて売切れてしまったので、とてもうれしかったです。


Anyway, I'd like to write more but my eyes are very tired although this is the first in 3 months that I've had some time to write and post in my blog. I wanted to post more about the process of learning I went through - sewing and making kanzashi. But I will do it when I have more time because I'm still busy perfecting my techniques in both. In the meantime, please check my shop and my facebook fanpage. Thank you!! ^^

もっといろいろご紹介したいのですが何しろ三ヶ月振りの更新なので目が疲れちゃいました。これから洋裁やかんざし作りについていろいろ書こうかなと思ったのですが、まだ勉強中ですのでもう少し後にします。それではEtsyとFacebookのファンページを今後ともよろしく!

Thursday 12 July 2012

How To Wear a Shawl: Type 2 - wrap it and loop it ショールの着こなし方:スタイルその2

This is the variation of the first one.

You can create a knot instead of letting both ends hang loosely.

これは、前回ご紹介したもののバリエーションです。今回は、ゆるく垂らすのではなく、結んでみましょう

How you do:

Take one end and bring it around the other end to create a loop. Then insert that end into the loop and tighten. And there you go! A very nice and casual way to wear a shawl. With this style you'll look classy even when you're in your plain T-shirt and a pair of jeans!


そのやり方。

片方の端を持ってそれをまわし、ループを作ります。その端をループに通して結びます。できあがり!素敵でカジュアルなショールの身に着け方です。このやり方ですとTシャツやジーンズでも上品に見えます。


For more batik silk shawl, visit my Etsy shop: Jagatara Art

もっとご覧になりたい方は、ぜひこちらへ!

First Project with Straight Stitches: Noren or Japanese Curtain 最初のプロジェクト:のれん

One of the misconceptions about using a sewing machine to do the stitching is that the machine will do EVERY little bit of work. I don't know if others have this idea but I DID. Before I began sewing that is.

ミシンについての誤解の一つに、ミシンは万能で、どんな縫い方もOKなのだ、というものがあります。他の方はわかりませんが、少なくとも私は、そう思っていました。私が実際に縫い物を始めるまでは。

Once I made the machine work, I tried to make stitches on a scrap of fabric. I lowered the presser foot and pushed the on button. As the machine was making stitches on the fabric, my eyes were closely watched the needle to make sure that the stitches were straight. Over and over again. More and more scraps. I wasn't satisfied as I made uneven stitches again and again. There's got to be tips. This one by Mallory I found really helpful!Thanks Mallory!!

私は手始めに、端切れを縫い合わせることから、練習を始めました。押さえを下ろして、ボタンを押します。ミシンが端切れを縫っている間、私は縫い目がまっすぐかどうか、しっかりと見守らなくてはなりませんでした。何度も何度も。端切れも次から次に使って。まっすぐにならないと、満足することは出来ません。行き詰ったら、お手本を参考にします。マロリーさんのお手本は、とても勉強になります。マロリーさんありがとう!


After practicing this method over and over again, I finally felt more confident to try to make a real project. And what is the ideal project for a beginner like me is none other than Japanese curtain or NOREN. No curves, no gatherings, not this or that, I needed simply straight seams to create one. In spite of this, I was a bit nervous. I didn't want to waste expensive fabric if I failed. so I bought a piece of cheap fabric at the nearest 100 yen shop. It was supposed to be a furoshiki. And ta daaaaaa... This is my very first project a couple of months ago!

こうして何度も練習を重ねているうちに、もっと本格的なものに挑戦しようという勇気が湧いてきました。私のような初心者に最適なのは、日本のカーテン、のれんです。カーブもなければ、複雑な縫い合わせなどもありません。まっすぐに縫い合わせるだけです。とは言え、少し不安でした。失敗して高い端切れを無駄にしたくありませんから!そこで私は近所の100円ショップに行って、安い端切れを買ってきました。それは最初は風呂敷でした。こうして最初の作品を仕上げました。一ヶ月前のことです。


After this I became more confident to make a more challenging project!

こうして、もっと挑戦しようという勇気が、さらに沸いてきたのです!

Sunday 1 July 2012

Learning To Use My sewing Machine ミシンの使い方を学ぶ!

When I decided to try my hand at sewing, the prospect was quite daunting. I mean, I had known what a sewing machine looks like but I was never curious as to know how it works. A friend suggested I should enroll at a sewing school or course. But there wasn't any around here. So the only way to do it is teaching myself. No ventured no gained, right?

独学で洋裁をマスターするぞ、と決めた時、私の見通しはそんなに明るいものではありませんでした。私は、ミシンがどんな形をしているかは知ってはいましたが、それがどう動くのかについては、それまで全然興味がありませんでした。友達は私に、洋裁学校か洋裁クラスへ通ったら?と勧めてくれました。でも悲しいことに、倉吉にはそのような学校もなければ、クラスもないのでありました(涙)。つまり、やろうと思えば、独学しかないのです。冒険をしなければ、得るものはない(『虎穴にはいらずんば虎児を得ず』)、です。

Then I started browsing Youtube, searching for videos on how to use a sewing machine. These are some which I find very useful.


まず私はYouTubeを使って、ミシンの使い方を紹介している動画を探すことから始めました。思ったとおり、いくつか非常に役に立つ動画がありました。


Her instructions are clear for a total beginner like me.

彼女の解説はとてもクリアで、私のような初心者にはうってつけです。


Watching her video convinced me that I could do it. I could teach myself to sew!!

彼女の動画を見ていると、なんだか自分にも出来そうな気がしてきます。よし、やるぞ!

But there was a crucial thing. In most videos, all of the sewing machines use foot pedals. The one that I got from my mother in-law doesn't have. It's a Juki HZL-9800. According to her, she's had it for over 10 years. And what's more, she has no longer the manual!! No manual, no foot pedal..how am I going to make this work??? I was thinking frantically

でも、問題が一つありました。大抵の動画にあるミシンには、全てフット・ペダルがついています。でもそれが、お義母さんからもらったミシンにはついていないのです。このミシンは、Juki HZL-9800という機種です。お義母さんによれば、10年前に手に入れたそうです。それだけではありません。取扱説明書もない!説明書もなければ、フットペダルもない・・・。どうしたらいいんだ?私は悩みに悩みました。


With my husband, I pushed every button on it:

旦那と一緒になって、とりあえずボタンをみんな、押してみる・・・。


These buttons which I found out later on are for types of stitches..

するとこれらのボタンは、スティッチのタイプに関係があるらしい、とわかりました。


Still types of stitches...

こんな感じです・・・。

After a while he gave up when it seemed to be a hopeless effort. While I was still curiously searching. And finally I got it!!

「わけわからん」。先に旦那が、ギブアップしました。私はなおも、格闘しました。そしてついにわかりました!


See those two buttons with different arrow signs? The one below serves like a foot pedal. I was just like EUREKA!! You know. It was such an exciting moment!!

この二つの矢印はなんぞや?下にあるのはフットペダルに関係があるらしいぞ。わかった!それは感動的な瞬間でした。

Then I found out that the knob on the right with two cute symbols of a rabbit and a turtle is to control the speed. And the button above with a U-turn sign is to do backstitches.

そして、右側にあるウサギとカメの絵のついたノブは、縫うスピードをコントロールするらしい。それに、Uターンの絵がついたボタンは、バックスティッチのためのものらしいぞ。

That day gave me more and more confidence that I would be able to sew. What a great day!!

この日、どうやら私にも出来そうだぞ、という自信がふつふつと沸いてきました。がんばるぞ!

Saturday 30 June 2012

How to wear a shawl: Style 1 ショールの着こなし方:スタイルその1

One thing that makes scarf or shawl so versatile is the number of style you can create with just one. By changing the way you tie it or drape, you will look differently in just a few seconds! That's how incredible a scarf or a shawl is.

スカーフあるいはショールの面白い点は、たった一つで何通りものスタイルを生み出せることです。結んだり羽織ったりするやり方をほんの少し変えるだけで、全然違って見えます。これがスカーフあるいはショールの素晴らしい点です。

Here is the very basic and most worn style when people wear a shawl or scarf:

1. Drape it around your neck with one end shorter than the other.
2. Wrap the longer end around your neck.
3. Pull closer to your neck and voila!


ここで、最もベーシックな着方をご紹介しましょう。

1. 片方をもう片方よりも短めに、首に掛けます。
2. 長い方を首に巻きます。
3. 軽くひっぱると、ほら出来上がり!


One thing you must remember. To create this style, you need a shawl or scarf that is at least 1.8 meters long so that both ends can hang nicely.

大事なことは、このやり方で綺麗に見せようと思えば、スカーフ(ショール)は、最低でも1.8メーターは必要かも知れませんね。

For more shawls, check out my Etsy shop: Jagatara Art

Wednesday 20 June 2012

Stitch Thru' Batik バティックへひと針を・・・


Look scary and creepy these sharp tools, don't they?

うわっ、見ただけで怖そうな、鋭いツールの数々・・・。

Up until about two months ago, I hadn't had a clue what they're for. How these sharp tools would help create dresses, skirts, pants, etc I never knew? They reminded me more of tools at the dentist's office that conjure up pain than those that create beauty.

実は二ヶ月近く前まで、私はこれらのツールが何なのか、全然わかっていませんでした。こんな鋭いツールがどうやってドレスや、スカートやパンツを生み出すのか?こういうものを見ると私は、美しいものを生み出すツールというよりは、怖い歯医者さんを思い出すのです。

But that silly thought of mine was over. Now I know what they are for and how to use them. I timidly started to buy each of them. Sometimes, I bought a tool after I'd made a mistake by simply thinking that one tool could do 2 or 3 tasks altogether. For example, I thought I could just use the ordinary scissors I'd already had would be enough to do all the cutting work such as cutting paper pattern, fabric, seams, etc. Then I realized that I needed a special pair of scissors to make a nice clean cut on the fabric. So I bought these pink bent-handled scissors. And others too like the seam ripper, thread nipper, etc.

でもそのような馬鹿な考えは、今は消え去りました。今の私は、これらが何のためにあるのか、どうやって使うのか、がわかります。私は恐る恐る、これらを買い集め始めました。私は一つのツールは、せいぜい2つか3つの仕事しかできないんだ、と単純に思い込んでいました。例えば、ハサミ。私はハサミはただ型紙を切ったり、布を切ったり、縫い目を切ったりするだけなのだから、普通のハサミを使えばいいんじゃないか、と思っていました。でも、布を正確に切ろうと思ったら、特殊なハサミがいるのだ、とわかりました。というわけで私は、このピンクの裁縫ハサミを買ったのです。同じようにして私は、リッパーやニッパーも買いました。

How I ended up taking up sewing was kind of obscure. I love handmade batiks and I often buy just because I can't help myself when I see beautiful batiks. They are so irresistible! But living in Japan where tailors are hardly to be found and if there's one, they're incredibly expensive, I can't have those batiks made into something usable or wearable. So, I had piles of batiks that I didn't know what I would do with.


なぜ私が裁縫をするようになったかというのは、なかなか難しいご質問です。私はハンドメイドのバティックが大好きで、それを見ると私は、たまらなくほしくなるのです。我慢できないんです!でも日本には、テーラーさんがいないのです。もしいたとしても、テーラーさんに頼むのはとてもお金がかかったりするので、これらのバティックを使えるようにしたり、着られるようにしたりするのは、とても難しいことなのです。ですから、私はたくさんのバティックのコレクションを持っていたとしても、それをどうやって使ったらいいのか、皆目見当がつきませんでした。


Suddenly I thought why not taking up sewing? Some people seem to have taught themselves to sew. They didn't go to any sewing schools. Plus there's plenty of sources where you get information on how to teach yourself to sew.

突然、私は思いつきました。自分でやったらいいんじゃない?世の中には裁縫を独学で学ぶ人もいます。彼らは裁縫学校へ行くわけではありません。それに今では、独学で裁縫を学ぶためのツールが、たくさんあります。

I mentioned the idea to my husband who thought that wasn't a bad idea at all.

私は旦那に相談しました。すると旦那は、それはいいアイディアだ、是非やってみるべきだよ、と言いました。

Every time we went to the electronic shop, we always checked out the sewing machines available there. I wasn't sure what kind I should buy. And suddenly my husband got home with a sewing machine. It's my mother in-law's! She has had it for about over 10 years. And apparently it hadn't been used for many years.

毎日私たちは近所の電気屋さんに行って、適当なミシンを探しました。でも私には、どんなミシンを買ったらよいのかも、全くわかりませんでした。すると旦那が実家へ帰って、ミシンを持ってきてくれました。それはお義母さんのミシンでした!彼女はそれを10年も前から持っていたのです。でもここ数年は、使われていませんでした。


Next things I needed was books about sewing tutorial since I'd decided to teach myself. But choosing the right ones was not easy because I had no clue as to what would be suitable for me. I found these and bought some patterns too.

次のステップは、裁縫の教則本探しです。だって私は、独学でやることに決めたのですから!でも自分にあったものを探すというのは、そんなに簡単ではありませんでした。なぜならどれが自分に合っているのか、その手がかりすらわからなかったからです。そんなわけで私は、こんな本とパターンブックを手に入れました。


And so I began my sewing adventure with batik :-)

こうして私の、バティックでの服作りの冒険が始まりました・・・。

Friday 15 June 2012

Tempe (Part 1) 美味しいテンペの作り方

One of the interesting things about living overseas is that you start to value things that you take for granted in your home country.

海外で暮らすことの面白い点の一つは、自分の国で当たり前だと思っていた物事の価値を、改めて見直すことです。

Take an example: food. It's common when you are in your home country, you don't finish your meal (for being too full perhaps) and you just throw it away without feeling guilty (or just a little bit of it). There's plenty of this food in the country so we often don't think much before throwing it away. But when you're in a foreign country, this particular food is immensely valued for its rarity. You look for it, search, hunt..You pay a great amount of money for just a tiny amount of this food. Then you start to realize how valuable this food is..

例えば、食べ物。自分の国に住んでいれば、お腹がいっぱいになったなどの理由で食べ物を残したり、あるいは捨てたりすることに対して、申し訳ない、と感じたりすることは、あまりないかも知れません(あるいはあったとしても、ほんの少しだったりします)。自分の国にはこの食べ物はたくさんあるのだから、と、それを省みることは、あまりなかったりします。でも、もし外国に住んでいれば、この食べ物は、とても貴重になります。なぜならそれは、めったに見られない食べ物に変貌するからです。このちっぽけな食べ物を手に入れるのに、たくさんお金を払わなければならないかも知れません。そのとき初めて、この食べ物が貴重なものであったと、知ることになるのです。

In my case, it is TEMPE or TEMPEH.

私の場合、それはテンペでした。

This molded soy bean foodstuff is served almost daily at the dining table of almost every household in Indonesia. It's kind of like misoshiru to Japanese. We, Indonesian, eat tempe everyday. It's cooked in 1001 ways. Fried, steamed, stir-fried. Served it as part of daily meals or as snack.

この発酵豆食品であるテンペは、インドネシアではほとんど毎日のように、食卓に上るものです。日本の味噌汁みたいなものですね。私たちインドネシア人は、テンペを毎日食べます。1001通りもの調理の仕方があります。揚げたり、蒸したり、混ぜ合わせてからフライにしたり・・・。三度の食事の他に、おやつとしても食べられます。

In Indonesia, it doesn't cost much to buy tempe. Here, in Japan it costs me over several hundreds yen to get about 300 gr of tempe. It's like 10 times!!! Given the price, I treasure tempe like I never did before.

インドネシアでは、テンペはそんなに高くありません。でもここ日本では、300グラムのテンペを手に入れるのに、数百円以上かかったりします。約10倍です!こうしてテンペは、今の私にとって、宝物になってしまったのです。

I made the best of my visit to Tokyo last month by shopping at Toko Indonesia Okubo. It's a shop selling Indonesia's foodstuff and other South East Asian's. It's located near Okubo station, Tokyo. I bought 3 chunks of tempe. I was so happy!! It's like finding a treasure!

幸運にも先月、私は上京して、大久保にある『トコ・インドネシア』で買い物をしました。そこでは、インドネシアやその他の東南アジアの食材を、簡単に手に入れることができます。東京の大久保駅のすぐ近くですね。私はテンペを、3パック買いました。嬉しい!それは宝物を見つけたようなものでした。

How do I cook tempe?

さて、どうやってテンペを料理しようか?

This is the simplest way of cooking tempe: deep-frying it.

最も簡単なテンペの料理の仕方、それは、フライです。

I'm going to share this simple recipe. Easy and delicious!

それでは、レシピをご紹介しましょう。簡単でおいしいですよ!

Ingredients:
About 300 gr of tempe
1 clove of garlic ground
a teaspoon of coriander seeds
salt
water


<材料>
300グラムのテンペ
にんにく一片
コリアンダー小さじ一杯


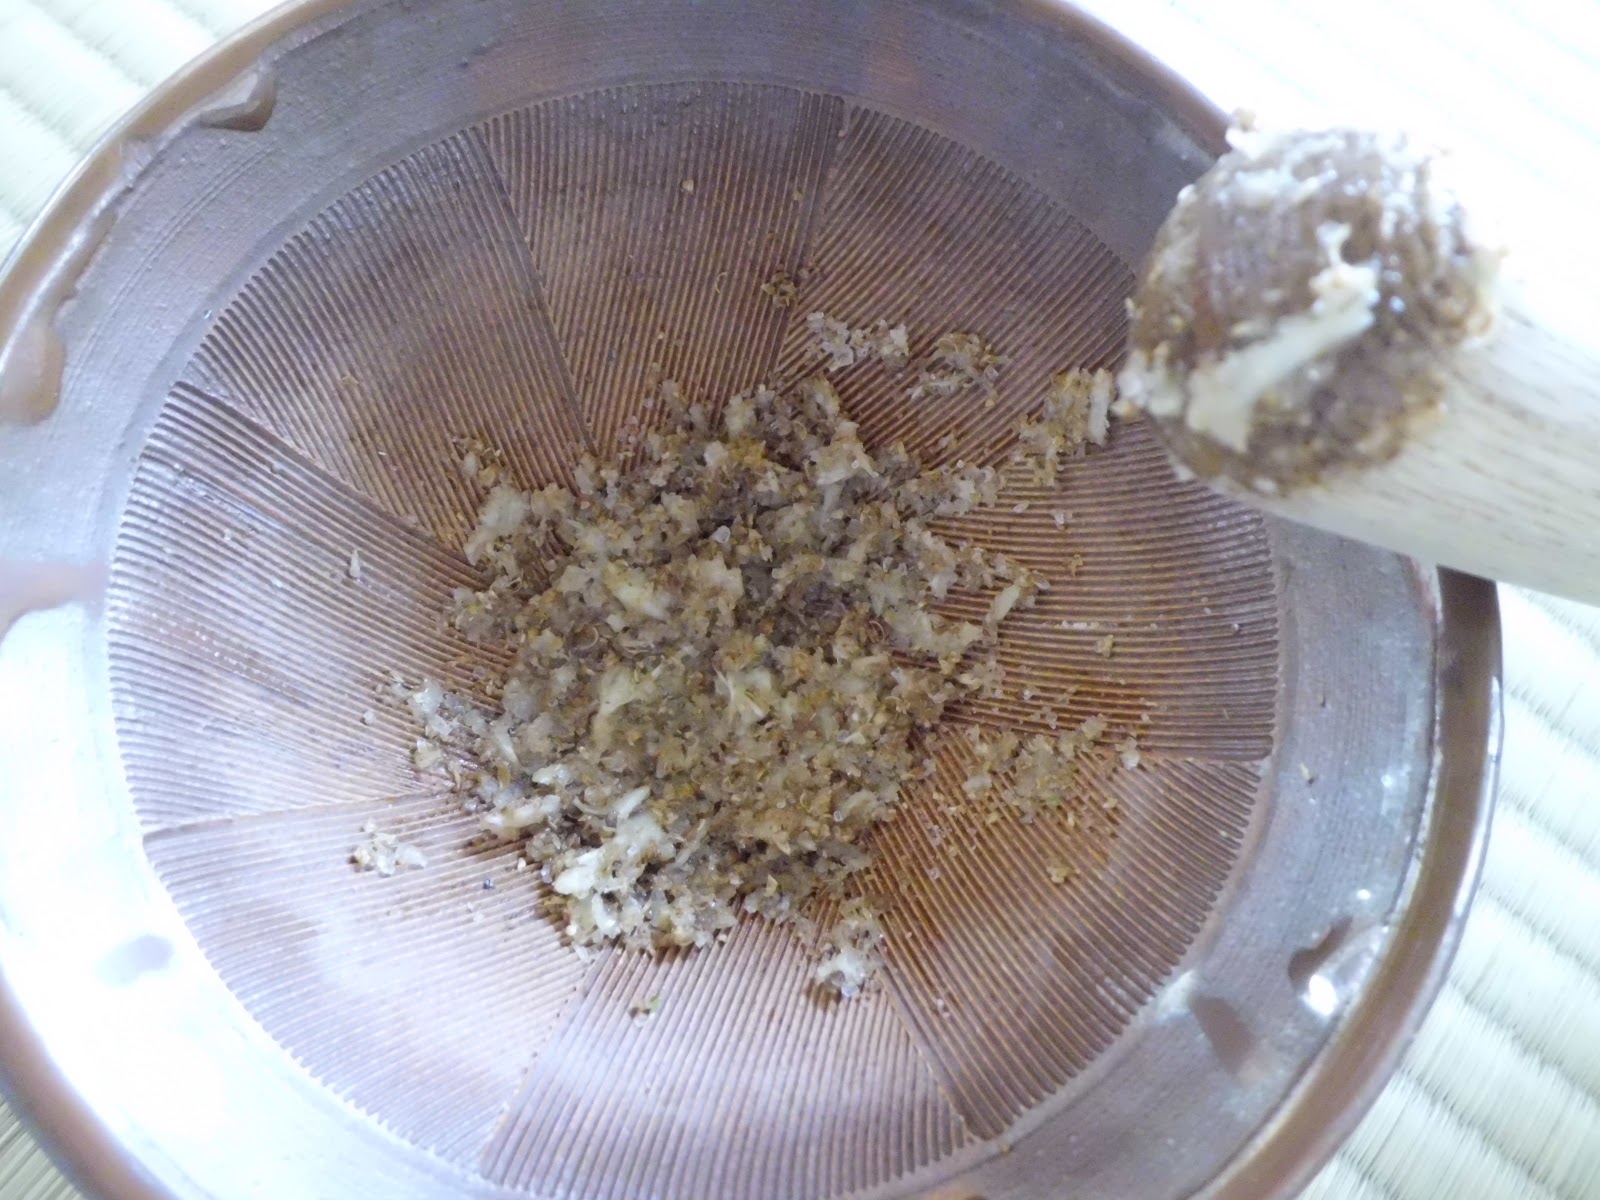
First peel the garlic, chopped and grind it using stone grinder if you have it. since I don't have a stone grinder either,  I use goma suri. It looks like this.

まずにんにくの皮をむき、それを千切りにして、もしあれば石臼で挽きます。うちには石臼がないので、胡麻すりを使います。こんな感じです。

Garlic, coriander seeds and salt are ground into paste.
にんにく、コリアンダー、塩をペースト状にします

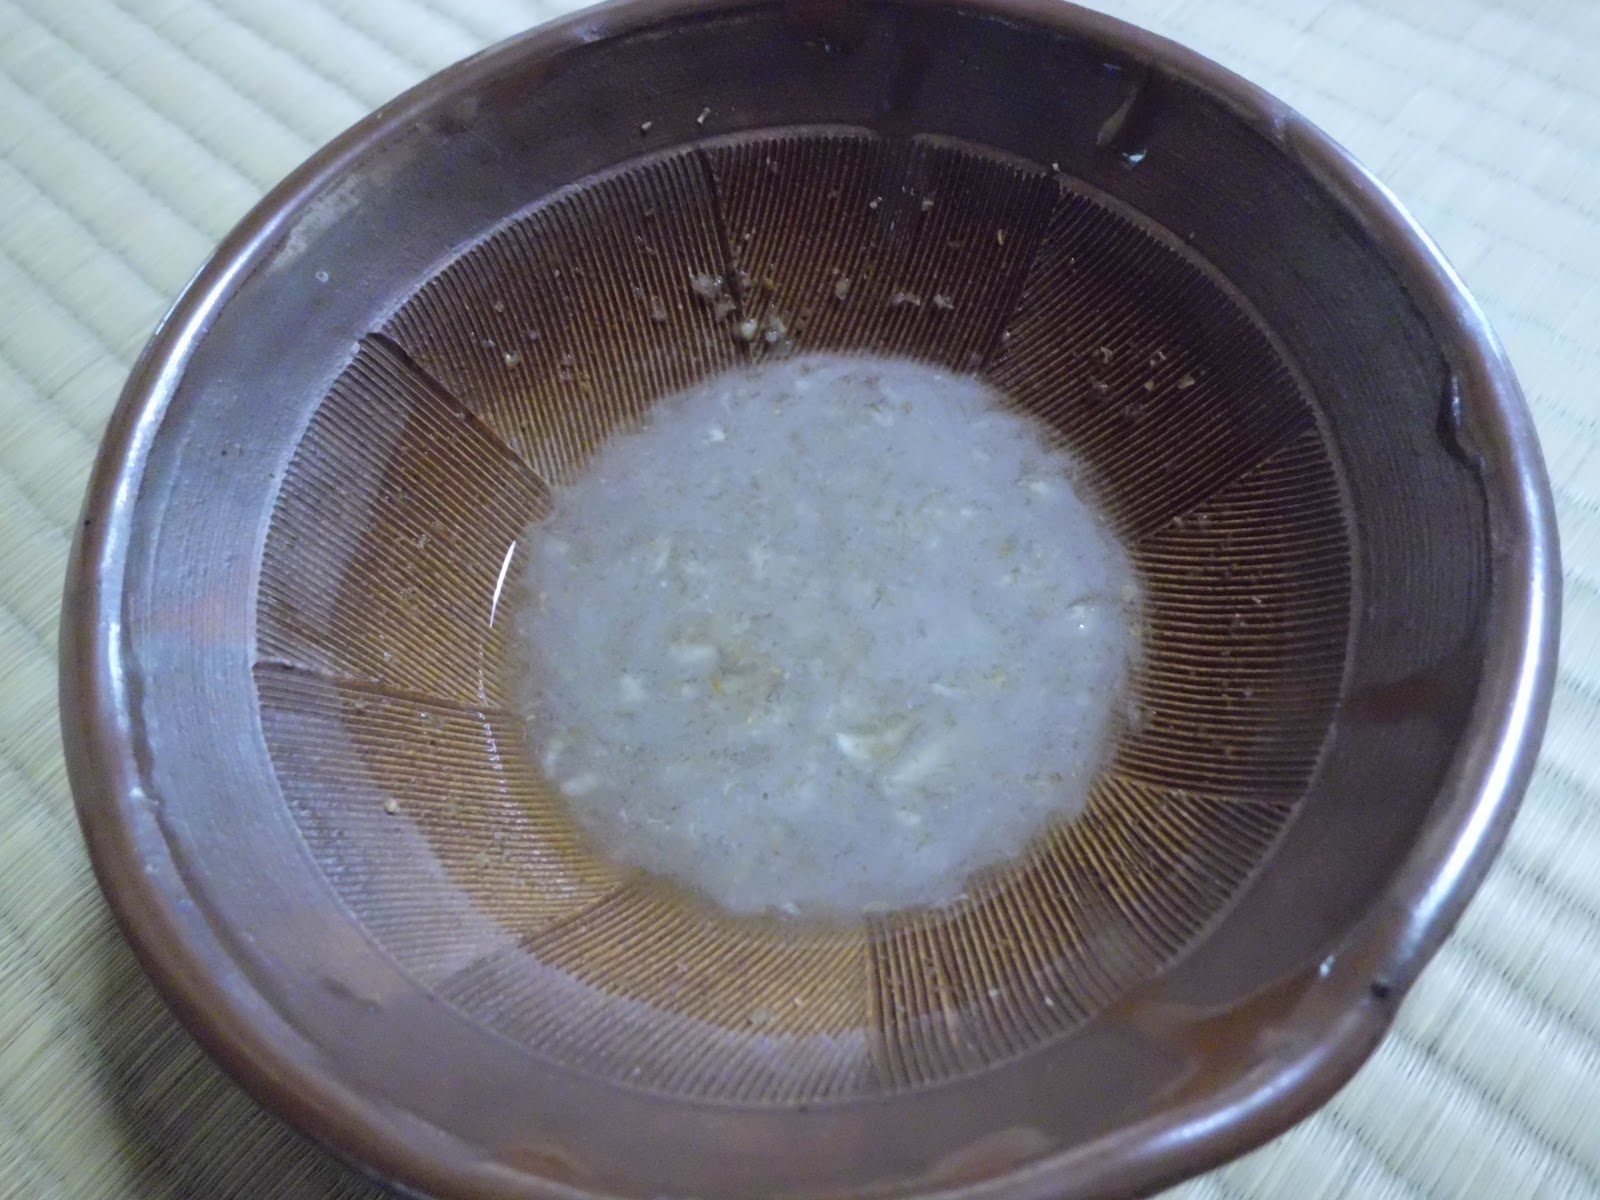
Then add some water.

次に水を加えます。

It will look like this.
こんな感じ。


Now take the tempe.

さあ、テンペの出番です。

The spongy cottony tempe. This is about 300 gr.
スポンジみたいにやわらかいテンペ。これで300グラム程度です。

Slice the tempe thinly about 3 mm or as you like.

テンペを厚さ3ミリ程度に、あるいはお好みに合わせてスライスします。

As you cut it, the tempe reveals its soy beans.
テンペを切ると、大豆が現れます。

After that marinate the slices of tempe in the mixture. And leave them for about 15 - 30 minutes depending how you like it. I like it with strong saltiness and coriander flavor. So I usually soak them for 30 minutes.

そしてそれを、マリネに漬けます。15分から30分、それもお好みです。私は少々塩味でコリアンダーの風味が効いている方が好みなので、大抵30分くらい漬けます。

Marinated.
漬けるとこんな感じ。
Then what is left is frying it. Deep fry it until golden brown.

後はそれを、フライにするだけです。黄金色になるまで、しっかりフライします。


Prepare some oil paper sheets to absorb the oil. Put the fried tempe on the sheets.

油を吸収するペーパーを、あらかじめ用意しておいて下さい。そのシートに、テンペをのせます。

And finally the simplest fried tempe is ready. Served with piping hot rice. Yummmm!! Bon apetit! Itadakimasu! Selamat makan! :-)


ついにテンペ・フライの出来上がりです。熱いご飯と一緒に召し上がれ。うーん、おいしい!いただきます!


The simplest way to enjoy tempe ^o^
テンペ楽しむ簡単なやり方!

Sunday 10 June 2012

Exhibition at DO Boutique Tokyo ブティックDoさんでの展示会

We thank DO Boutique, Tokyo for their generosity in hosting a small exhibition for our batik items. It was a great pleasure to know that batik is accepted in Japan.

東京のブティックDoさんのおかげで、バティックの小さな展示会を開くことが出来ました。日本でバティックが受け入れられて、とても嬉しいです。

The window display and announcement.
ディスプレイと紹介

One corner where they displayed our batiks.
うちのバティックが紹介されているコーナー

Batiks and batik silk shawls.
バティックの生地とショール

Batik tunic and silk batik shawl.
バティックのチュニックとショール

A piece of hand-drawn batik at another corner.
手描きバティックが紹介されているコーナー

Choosing a silk batik scarf.
シルクのバティックのスカーフをお選びのところ
We hope that we're able to do another exhibition soon in Tokyo or other places in Japan or in other parts of the world!

また東京で近いうちに展示会を開きたいです。あるいは他の場所でも、そして世界でも!

Thursday 31 May 2012

From Sultans to Jessica Alba to Dries Van Noten スルタンからジェシカ・アルバあるいはドリス・ヴァン・ノッテンへ

I've learned about this for a long time but never got around to writing about it until now.

今日お話しすることは、実はずっと前から知っていたことなのですが、今まで触れないでいたことです。

I don't remember how I got to know this. Was it by chance while browsing the net? Or was it from the batik fan group on Facebook where I belong to? I can't quite remember.  But it was a much-talked-about issue in the group. The subject was Jessica Alba wearing a dress with batik print. What was so particular was that the batik pattern was definitely a Javanese batik pattern. And this batik pattern has become some sort of signature of Indonesian Javanese batik. Learning that a personage such as Jessica Alba wore this pattern stirred excitement among the members: Batik Goes International!!! It created endless thread in the group.

いつこのことについて知ったのか、自分でも覚えていません。ネットを見ていた時に知ったのでしょうか?それともフェイスブックのバティックのファンページを見ていた時に知ったのでしょうか?よく思い出せません。でもこのことは、このグループではよく話題になっていたことなのです。それは、ジェシカ・アルバがバティックを着ていたことです。このパターンは、ジャワのバティックのとても有名なパターンです。ジェシカ・アルバのような有名人がこのパターンを着ていたので、メンバー達はかなり興奮しました。バティックが世界に!この話題は、長いこと話題になりました。

Photos of Alba at the event "Step Up Women's Network Fourth Annual Fashion Forward Luncheon" At the event Jessica was wearing a dress with batik pattern that appeared to be the famous pattern called Parang Rusak..  


これはアルバの、"Step Up Women's Network Fourth Annual Fashion Forward Luncheon"というイベントでのフォトですが、ここで彼女は、パラン・ルサックという有名なパターンのドレスを着ています。


Parang means dagger or knife like machete and Rusak means broken or damaged. Therefore, Parang Rusak literally means broken or damaged dagger. The word parang appeared in a 14th-century Javanese literature "Negarakertagama" in a form of Parangmuka which means "enemy". So, parang rusak probably means "enemy destroying". Considered sacred and symbolizing authority, power, and nobility, in the past this pattern was only allowed to be worn by the Sultans and their immediate families at the courts of Jogjakarta and Surakarta (Solo). It was also believed that the pattern possessed some kind of protective power. It is said that the Javanese princes would wear this pattern when going to war.

パランとはマチェーテのような「剣」あるいは「刀」の意味で、ルサックは「壊れた」あるいは「崩れた」という意味です。つまり、パラン・ルサックとは文字通りでは、「壊れた刀」という意味です。パランという言葉は14世紀のジャワの文献「ネガラケルタガマ」に"パランムカ"という言葉で、「軍隊」という意味で登場します。つまり、パラン・ルサックは多分元々は、「敵を破壊する」という意味なのです。神聖、権威、権力、高貴を象徴するということで、昔はこのパターンは、ジョグジャカルタやスラカルタ(ソロ)の王族しか着ることを許されませんでした。このパターンには身を守る不思議な力がある、とも信じられました。ジャワの皇太子はこのパターンを身にまとって、戦争に赴いたと言われます。

Little princes of the court Jogjakarta wearing batik with Parang Rusak pattern.
パラン・ルサックのパターンを身にまとった王族の皇太子達


Sultan Hamengku Buwana VII of the court Jogjakarta. Ca. 1870 - 1890.
ジョグジャカルタのハメング・ブワナ七世(在位:1870-1890)
Fortunately nowadays such strict rules where this pattern was preserved for the royal families no longer exist. Everyone can wear this pattern. Thanks to this, the pattern has been an inspiration for some of international fashion designers.

幸いなことに今日では、このパターンは王族のみに許されるといった厳格な風習は存在しません。誰でもが着ることが出来ます。そのおかげでこのパターンは、世界中のファッション・デザイナーのインスピレーションの源泉となっています

Dries Van Noten's summer collection 2010 was inspired by this pattern.

ドリス・ヴァン・ノッテンの2010年のサマー・コレクションは、このパターンにインスパイアされています。
 

Sometimes I wonder. If the Javanese Sultans of the olden days witnessed this phenomenon, what would they say about it? Or how would they feel? Would they be proud or furious?..

時々私は思います。もし昔のスルタンが今日のこのような状況を見たら、何と言うかな?どう思うかな?嬉しく思うのかな、怒るのかな?

Saturday 12 May 2012

Tokyo, I'm comiiiiing! 久々の東京です!

After long waiting and anticipating, we finally got news from a gallery in Tokyo. They are definitely hosting our first exhibition!! They're holding the exhibition from 22nd until 30th of May.

水面下で進めてきた東京での展示会の計画が、正式に決定しました。久々の東京です!場所は東京都大田区にありますブティックDoの本店、こちらで、5月22日から30日まで、『夏だからジャワ更紗』というタイトルで、 開催されます。

The gallery sent us the format of their direct mail.

ギャラリーから、ダイレクトメールの原稿を送ってもらいました。


And I made my own in English :-)

そしてこれは、私が作った英語版です。


It's a rare opportunity so I'm pretty excited and anxious at the same time. I really hope we finally find the right market for our handmade batiks.

久々の展示会なので、ちょっと緊張です。東京でも手描きバティックの販路が広げられるように、がんばりたいと思います。

For those of you who live in Tokyo area, if you have a chance, please visit the exhibition.Thank you and see you there! ^o^

東京近辺にお住まいの方、ぜひご来店下さい!

Thursday 10 May 2012

Model For Shawl and Scarf Collection ショール・スカーフ・コレクションのモデルさん

I've been really fortunate to take a Japanese class at Kurayoshi's International Friendship Organization. I get to meet people from different countries and be friends with them.  I've always been interested in different cultures and to know them has been wonderful!

私はずっと、鳥取県国際交流財団倉吉事務所の日本語クラスに通っています。そこではたくさんの同じ外国人の友達に、会うことができます。外国の文化にはとても興味があるので、彼らと友達になれるのは、とても楽しいです!

One of my good friends is Samrawit Sisay from Ethiopia. She wants us to call her Samri for short. A very lively and cheerful young woman, newly wed, Samri-san has made our class a very fun class with her spontaneous remarks and laughter. Having moved to Misasa from Addis Ababa following her husband who is pursuing a Ph.D at the Okayama University's Institute For Study of The Earth's Interior she has managed to adapt herself in a tranquil Misasa.

その友達の一人が、エチオピアからやってきたサムラウィ・シセイさんです。私達は短く、「サムリ」と呼んでいます。とても活発で明るい新婚さんの女性で、いつも教室を楽しい雰囲気にしてくれます。彼女は、旦那さんが岡山大学地球物質科学研究センターでPHD課程を専攻している関係で、アジスアベバから三朝に引っ越してきました。彼女は三朝の落ち着いた雰囲気を気に入っているようです。

Since she is so bubbly and lively, I thought she would make a great model for my shawls. I was really glad that she happily agreed! I was confident that she would do justice. And she DID!! She loved colors, patterns and everything about the shawls, which made our photo session a GREAT FUN! Just look at these photos and I'm sure you'd agree with me that I made the right choice :-)

彼女はとても元気がよく朗らかなので、私のショールのモデルさんにぴったりかも、と思いました。彼女が乗る気になってくれたので、とても嬉しかった!私は彼女がきっと素晴らしいモデルになってくれるだろう、と確信していました。そして、それは本当でした!彼女はショールの色やパターンなど全てを気に入ってくれて、フォトセッションはとても楽しいものでした!この写真を見たら皆さんにも、それがご理解いただけると思います!

Smiling Samri-san

never stopped smiling while I was arranging the shawl

More smile with my newest collection of batik silk scarf for Summer

Smiling Samwri-san with red batik silk scarf

laugh

and more laugh!! :-)

Soon I will publish my newest collection of batik silk scarf for Summer. Stay tuned! :-)

まもなく夏向けのバティックのシルクスカーフの最新のコレクションをご紹介します。お楽しみに!

Friday 4 May 2012

MOTHER'S DAY SPECIAL FREE SHIPPING: Turquoise Silk Stole/Shawl 母の日に合わせて送料無料セール!ターコイズのシルク・ショール

Free Shipping to everywhere in this month is available at my shop 今月はどこでも送料無料!

http://www.etsy.com/shop/JagataraArt 


Versatile Light Turquoise Silk Stole/Shawl. Completely handmade and truly original. These are some of the styles. You can create much more.

何にでも使える軽いシルク・ストール。完全ハンドメイドのオリジナル作品です。写真は使い方のほんの一例です。もっといろいろ工夫もできますよ!


Tie-knot style

Classic wrap around the neck

Elegant wrap

Gorgeous halter top
Price: $68 (5500円) 

Facebook fanpage