Well, the thing was that I couldn't make kanzashi and take pictures at the same time. That's just impossible. So a few weeks ago, I had my husband take some pictures while I was making. And he was happily taking some ^_^
At that time I was making a small kanzashi hair comb consisting of 3 flowers with a sagari dangle.

I'm sorry that this tutorial only covers how to make one flower and not the overall arrangement. However, I hope this will give you an idea to try this by yourself.
First of all, the supplies:
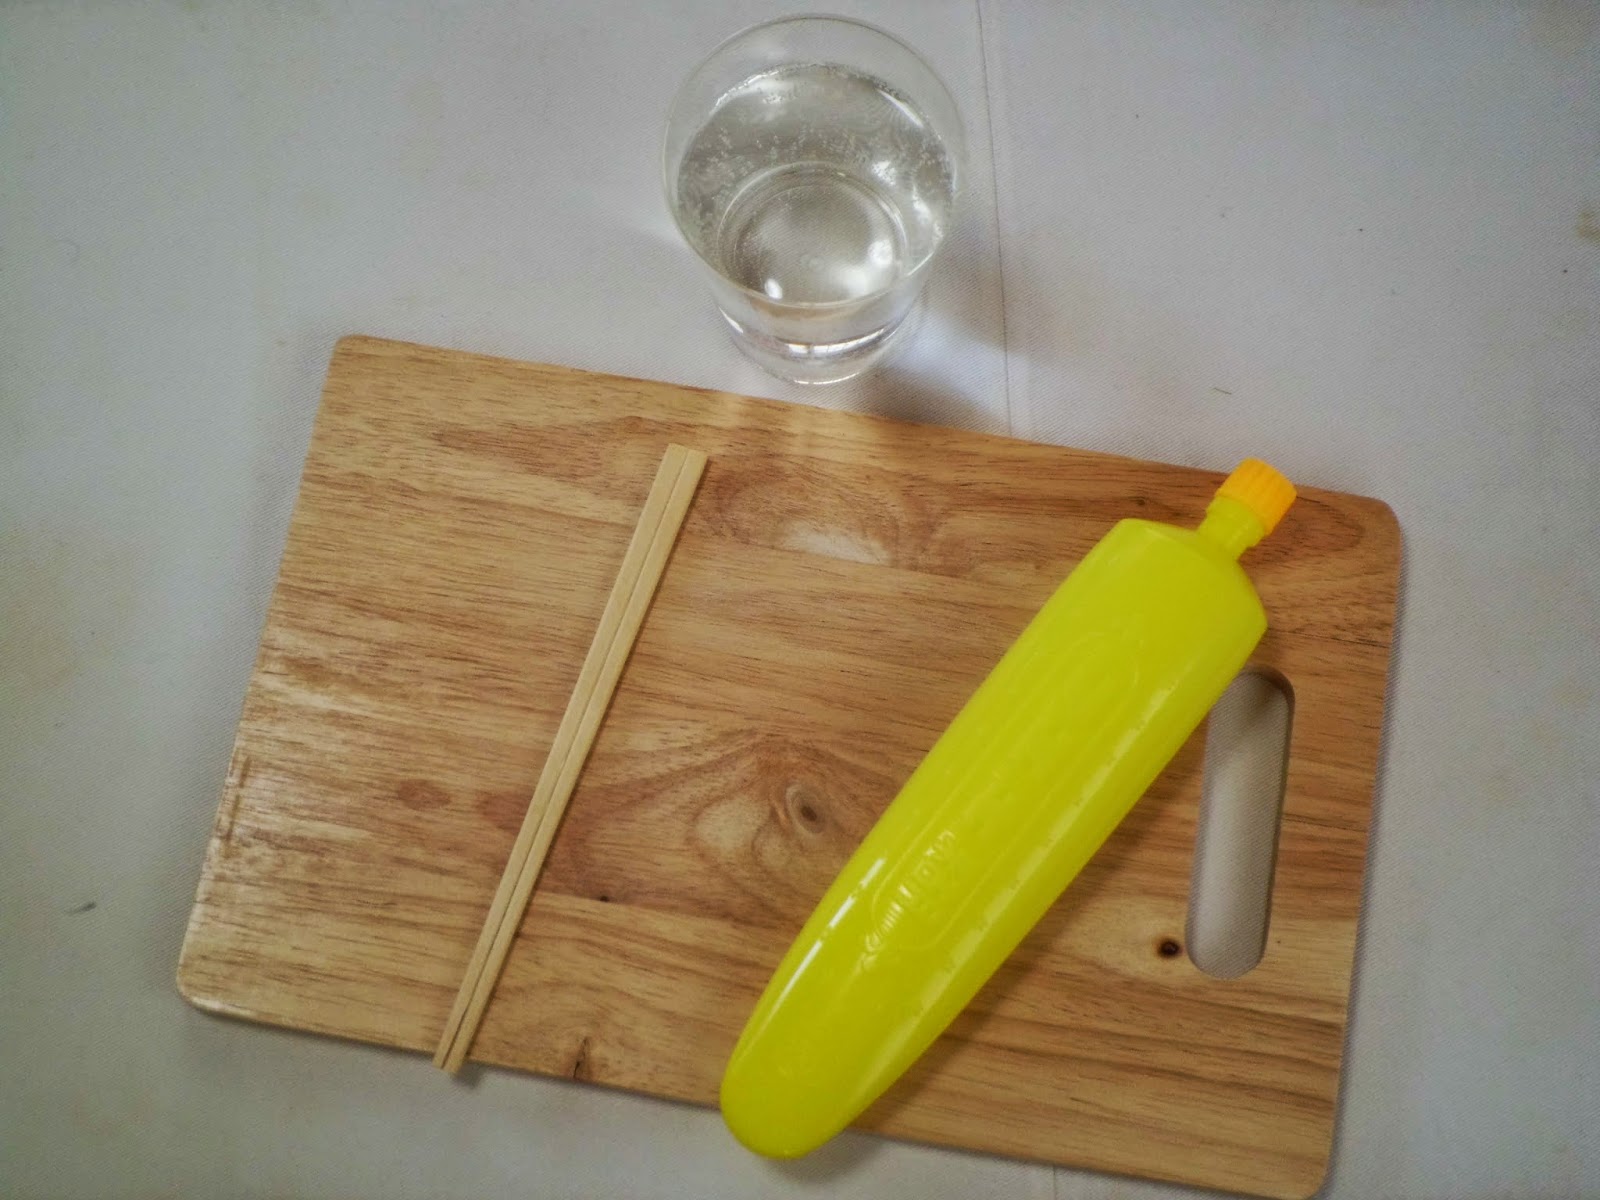
You need some rice glue paste or denpun nori in Japanese. It's easy to find in stationary shops or craft supply shops in Japan. However, if you live in a country where denpun nori is not available, you can try making your own rice glue paste. This is the link to how to make it: How to make rice glue. Then you'll need a wooden board to spread the glue on. Be resourceful. You don't need a special kanzashi wooden board. Just a wooden board with smooth surface. In my case, I bought my wooden board at a 100 yen shop. It cost me 200 yen or about $2. It's actually a cutting board :) but it works just as well. Also to spread the glue, I just use an unsplit pair of chopsticks. Dip the pair chopsticks (or spatula or anything that works the same) into the water before using it to spread the glue.


Now that you have spread the glue on the board, you can prepare the squares.
You'll need a piece of fabric. Usually and traditionally, kanzashi crafters use habotai silk or China silk and hand dye it. But I choose to use scraps. The reason is simple: to reduce waste. I'm trying to be as eco-friendly as possible and besides I have tons of batik scraps and vintage kimonos that my mother in-law happily donates to me from time to time. So, this time I choose a lining from a vintage kimono. Before I cut it into squares, I starched it using spray starch and ironed it.

Then I cut 15 squares out of it. Each square is about 2.3 cm (a bit less than 1 inch I think).

Next, start to fold the squares. For the flowers I make round petals. Fold the square in half diagonally. Then fold the right hand corner to meet the bottom corner and do the same with the left hand corner. And then fold the whole piece in half. Most kanzashi crafters hold along the bottom side, but I prefer to hold the corner where all corners meet. Which one is better depends on how comfortable you hold the piece. Finally, put the petal on the glue. Use tweezers to hold the petals.


To make the leaves, I make pointed petals. The first step is similar to the round petal. Fold the square in half and fold again in half. Again you may grip the petal alongside the bottom or just like I do, only the corner where all corners meet. Finally, place the petal on the glue.


Now, you make the bases. To make a base, cut a round cardboard. Since the square is 2.3 cm, I cut a round cardboard which is 1.5 cm in diameter. Cut also a piece of fabric in circle, slightly larger than the round cardboard, maybe 2 cm or 2.2 in diameter.


Now, you're ready to assemble the petals. Again, most kanzashi crafters grip the bottom of the petal, while I prefer to hold just the corner. When you've finished placing 5 petals on the base, tidy them and remove the excess of glue gently with tweezers. Note: prepare a wet towel to clean the tweezers off the glue. Sticky tweezers make it difficult for your to arrange the petals. So, wipe them frequently while you're assembling the petals.


When you're done assembling the petals. Leave the flowers for a couple of hours to let the glue dry before you add other decorations or attach them to a hair clip / hair comb / hair stick. It's hard to determine exactly how many hours, since it depends on the climate and weather in your place. In my case, in winter it takes me 2 or 3 days. In summer it takes only 3 - 6 hours.

When the glue has dried, now you're ready to attach them. Tie the flowers into one bundle with a string. Then attach the bundle on a hair comb or a hair stick with string. You can add other decorations if you like.
There you have your kanzashi flower.


terlihat sprt mudah.....itu lemnya namanya lem apa ya? kira2 klo di Imdonesia ada apa tdk? tks ya utk tutorialnya
ReplyDeleteMbak Sury, maaf baru balas. Lama ngga ngeposting. Musim panas saya jarang nulis krn panas.
DeleteKurang tahu ya mbak, apa lem seperti ini dijual di Indonesia. Yg jelas, kalau dlm seni kanzashi atau tsumami zaiku tradisional di Jepang. Lem seperti ini yg dipakai. :)
How do you make the dangle?
ReplyDeleteSorry I didn't get to take a picture of how to make the dangle. Making tutorial is quite time consuming. But maybe I can explain here.
DeleteTo make the dangle, spread a piece of string (or a few pieces depending on how many dangles you want). Hold each end of the string with a piece of scotch tape. Then one by one put the petals on the string. Leave them to dry.
I hope it helps :)
Sorry I didn't get to take a picture of how to make the dangle. Making tutorial is quite time consuming. But maybe I can explain here.
ReplyDeleteTo make the dangle, spread a piece of string (or a few pieces depending on how many dangles you want). Hold each end of the string with a piece of scotch tape. Then one by one put the petals on the string. Leave them to dry.
I hope it helps :)
What is the cord that is wrapped around the wires? I have looked everywhere for an explanation, but no one mentions it.
ReplyDeleteThank you so much for your time & effort on creating this tutorial. Now I am on the search for the best rice glue recipe.
ReplyDelete