This is the variation of the first one.
You can create a knot instead of letting both ends hang loosely.
これは、前回ご紹介したもののバリエーションです。今回は、ゆるく垂らすのではなく、結んでみましょう
How you do:
Take one end and bring it around the other end to create a loop. Then insert that end into the loop and tighten. And there you go! A very nice and casual way to wear a shawl. With this style you'll look classy even when you're in your plain T-shirt and a pair of jeans!
そのやり方。
片方の端を持ってそれをまわし、ループを作ります。その端をループに通して結びます。できあがり!素敵でカジュアルなショールの身に着け方です。このやり方ですとTシャツやジーンズでも上品に見えます。
For more batik silk shawl, visit my Etsy shop: Jagatara Art
もっとご覧になりたい方は、ぜひこちらへ!
インドネシア嫁 ジャワから日本へ From Java to Japan. An Indonesian wife in Japan, tsumami zaiku and crochet crafter.
Thursday, 12 July 2012
First Project with Straight Stitches: Noren or Japanese Curtain 最初のプロジェクト:のれん
One of the misconceptions about using a sewing machine to do the stitching is that the machine will do EVERY little bit of work. I don't know if others have this idea but I DID. Before I began sewing that is.
ミシンについての誤解の一つに、ミシンは万能で、どんな縫い方もOKなのだ、というものがあります。他の方はわかりませんが、少なくとも私は、そう思っていました。私が実際に縫い物を始めるまでは。
Once I made the machine work, I tried to make stitches on a scrap of fabric. I lowered the presser foot and pushed the on button. As the machine was making stitches on the fabric, my eyes were closely watched the needle to make sure that the stitches were straight. Over and over again. More and more scraps. I wasn't satisfied as I made uneven stitches again and again. There's got to be tips. This one by Mallory I found really helpful!Thanks Mallory!!
私は手始めに、端切れを縫い合わせることから、練習を始めました。押さえを下ろして、ボタンを押します。ミシンが端切れを縫っている間、私は縫い目がまっすぐかどうか、しっかりと見守らなくてはなりませんでした。何度も何度も。端切れも次から次に使って。まっすぐにならないと、満足することは出来ません。行き詰ったら、お手本を参考にします。マロリーさんのお手本は、とても勉強になります。マロリーさんありがとう!
After practicing this method over and over again, I finally felt more confident to try to make a real project. And what is the ideal project for a beginner like me is none other than Japanese curtain or NOREN. No curves, no gatherings, not this or that, I needed simply straight seams to create one. In spite of this, I was a bit nervous. I didn't want to waste expensive fabric if I failed. so I bought a piece of cheap fabric at the nearest 100 yen shop. It was supposed to be a furoshiki. And ta daaaaaa... This is my very first project a couple of months ago!
こうして何度も練習を重ねているうちに、もっと本格的なものに挑戦しようという勇気が湧いてきました。私のような初心者に最適なのは、日本のカーテン、のれんです。カーブもなければ、複雑な縫い合わせなどもありません。まっすぐに縫い合わせるだけです。とは言え、少し不安でした。失敗して高い端切れを無駄にしたくありませんから!そこで私は近所の100円ショップに行って、安い端切れを買ってきました。それは最初は風呂敷でした。こうして最初の作品を仕上げました。一ヶ月前のことです。
After this I became more confident to make a more challenging project!
こうして、もっと挑戦しようという勇気が、さらに沸いてきたのです!
ミシンについての誤解の一つに、ミシンは万能で、どんな縫い方もOKなのだ、というものがあります。他の方はわかりませんが、少なくとも私は、そう思っていました。私が実際に縫い物を始めるまでは。
Once I made the machine work, I tried to make stitches on a scrap of fabric. I lowered the presser foot and pushed the on button. As the machine was making stitches on the fabric, my eyes were closely watched the needle to make sure that the stitches were straight. Over and over again. More and more scraps. I wasn't satisfied as I made uneven stitches again and again. There's got to be tips. This one by Mallory I found really helpful!Thanks Mallory!!
私は手始めに、端切れを縫い合わせることから、練習を始めました。押さえを下ろして、ボタンを押します。ミシンが端切れを縫っている間、私は縫い目がまっすぐかどうか、しっかりと見守らなくてはなりませんでした。何度も何度も。端切れも次から次に使って。まっすぐにならないと、満足することは出来ません。行き詰ったら、お手本を参考にします。マロリーさんのお手本は、とても勉強になります。マロリーさんありがとう!
こうして何度も練習を重ねているうちに、もっと本格的なものに挑戦しようという勇気が湧いてきました。私のような初心者に最適なのは、日本のカーテン、のれんです。カーブもなければ、複雑な縫い合わせなどもありません。まっすぐに縫い合わせるだけです。とは言え、少し不安でした。失敗して高い端切れを無駄にしたくありませんから!そこで私は近所の100円ショップに行って、安い端切れを買ってきました。それは最初は風呂敷でした。こうして最初の作品を仕上げました。一ヶ月前のことです。
After this I became more confident to make a more challenging project!
こうして、もっと挑戦しようという勇気が、さらに沸いてきたのです!
Sunday, 1 July 2012
Learning To Use My sewing Machine ミシンの使い方を学ぶ!
When I decided to try my hand at sewing, the prospect was quite daunting. I mean, I had known what a sewing machine looks like but I was never curious as to know how it works. A friend suggested I should enroll at a sewing school or course. But there wasn't any around here. So the only way to do it is teaching myself. No ventured no gained, right?
独学で洋裁をマスターするぞ、と決めた時、私の見通しはそんなに明るいものではありませんでした。私は、ミシンがどんな形をしているかは知ってはいましたが、それがどう動くのかについては、それまで全然興味がありませんでした。友達は私に、洋裁学校か洋裁クラスへ通ったら?と勧めてくれました。でも悲しいことに、倉吉にはそのような学校もなければ、クラスもないのでありました(涙)。つまり、やろうと思えば、独学しかないのです。冒険をしなければ、得るものはない(『虎穴にはいらずんば虎児を得ず』)、です。
Then I started browsing Youtube, searching for videos on how to use a sewing machine. These are some which I find very useful.
まず私はYouTubeを使って、ミシンの使い方を紹介している動画を探すことから始めました。思ったとおり、いくつか非常に役に立つ動画がありました。
Her instructions are clear for a total beginner like me.
彼女の解説はとてもクリアで、私のような初心者にはうってつけです。
Watching her video convinced me that I could do it. I could teach myself to sew!!
彼女の動画を見ていると、なんだか自分にも出来そうな気がしてきます。よし、やるぞ!
But there was a crucial thing. In most videos, all of the sewing machines use foot pedals. The one that I got from my mother in-law doesn't have. It's a Juki HZL-9800. According to her, she's had it for over 10 years. And what's more, she has no longer the manual!! No manual, no foot pedal..how am I going to make this work??? I was thinking frantically
でも、問題が一つありました。大抵の動画にあるミシンには、全てフット・ペダルがついています。でもそれが、お義母さんからもらったミシンにはついていないのです。このミシンは、Juki HZL-9800という機種です。お義母さんによれば、10年前に手に入れたそうです。それだけではありません。取扱説明書もない!説明書もなければ、フットペダルもない・・・。どうしたらいいんだ?私は悩みに悩みました。
With my husband, I pushed every button on it:
旦那と一緒になって、とりあえずボタンをみんな、押してみる・・・。
These buttons which I found out later on are for types of stitches..
するとこれらのボタンは、スティッチのタイプに関係があるらしい、とわかりました。
Still types of stitches...
こんな感じです・・・。
After a while he gave up when it seemed to be a hopeless effort. While I was still curiously searching. And finally I got it!!
「わけわからん」。先に旦那が、ギブアップしました。私はなおも、格闘しました。そしてついにわかりました!
See those two buttons with different arrow signs? The one below serves like a foot pedal. I was just like EUREKA!! You know. It was such an exciting moment!!
この二つの矢印はなんぞや?下にあるのはフットペダルに関係があるらしいぞ。わかった!それは感動的な瞬間でした。
Then I found out that the knob on the right with two cute symbols of a rabbit and a turtle is to control the speed. And the button above with a U-turn sign is to do backstitches.
そして、右側にあるウサギとカメの絵のついたノブは、縫うスピードをコントロールするらしい。それに、Uターンの絵がついたボタンは、バックスティッチのためのものらしいぞ。
That day gave me more and more confidence that I would be able to sew. What a great day!!
この日、どうやら私にも出来そうだぞ、という自信がふつふつと沸いてきました。がんばるぞ!
Saturday, 30 June 2012
How to wear a shawl: Style 1 ショールの着こなし方:スタイルその1
One thing that makes scarf or shawl so versatile is the number of style you can create with just one. By changing the way you tie it or drape, you will look differently in just a few seconds! That's how incredible a scarf or a shawl is.
スカーフあるいはショールの面白い点は、たった一つで何通りものスタイルを生み出せることです。結んだり羽織ったりするやり方をほんの少し変えるだけで、全然違って見えます。これがスカーフあるいはショールの素晴らしい点です。
Here is the very basic and most worn style when people wear a shawl or scarf:
1. Drape it around your neck with one end shorter than the other.
2. Wrap the longer end around your neck.
3. Pull closer to your neck and voila!
ここで、最もベーシックな着方をご紹介しましょう。
1. 片方をもう片方よりも短めに、首に掛けます。
2. 長い方を首に巻きます。
3. 軽くひっぱると、ほら出来上がり!
One thing you must remember. To create this style, you need a shawl or scarf that is at least 1.8 meters long so that both ends can hang nicely.
大事なことは、このやり方で綺麗に見せようと思えば、スカーフ(ショール)は、最低でも1.8メーターは必要かも知れませんね。
For more shawls, check out my Etsy shop: Jagatara Art
Wednesday, 20 June 2012
Stitch Thru' Batik バティックへひと針を・・・
Look scary and creepy these sharp tools, don't they?
うわっ、見ただけで怖そうな、鋭いツールの数々・・・。
Up until about two months ago, I hadn't had a clue what they're for. How these sharp tools would help create dresses, skirts, pants, etc I never knew? They reminded me more of tools at the dentist's office that conjure up pain than those that create beauty.
実は二ヶ月近く前まで、私はこれらのツールが何なのか、全然わかっていませんでした。こんな鋭いツールがどうやってドレスや、スカートやパンツを生み出すのか?こういうものを見ると私は、美しいものを生み出すツールというよりは、怖い歯医者さんを思い出すのです。
But that silly thought of mine was over. Now I know what they are for and how to use them. I timidly started to buy each of them. Sometimes, I bought a tool after I'd made a mistake by simply thinking that one tool could do 2 or 3 tasks altogether. For example, I thought I could just use the ordinary scissors I'd already had would be enough to do all the cutting work such as cutting paper pattern, fabric, seams, etc. Then I realized that I needed a special pair of scissors to make a nice clean cut on the fabric. So I bought these pink bent-handled scissors. And others too like the seam ripper, thread nipper, etc.
でもそのような馬鹿な考えは、今は消え去りました。今の私は、これらが何のためにあるのか、どうやって使うのか、がわかります。私は恐る恐る、これらを買い集め始めました。私は一つのツールは、せいぜい2つか3つの仕事しかできないんだ、と単純に思い込んでいました。例えば、ハサミ。私はハサミはただ型紙を切ったり、布を切ったり、縫い目を切ったりするだけなのだから、普通のハサミを使えばいいんじゃないか、と思っていました。でも、布を正確に切ろうと思ったら、特殊なハサミがいるのだ、とわかりました。というわけで私は、このピンクの裁縫ハサミを買ったのです。同じようにして私は、リッパーやニッパーも買いました。
How I ended up taking up sewing was kind of obscure. I love handmade batiks and I often buy just because I can't help myself when I see beautiful batiks. They are so irresistible! But living in Japan where tailors are hardly to be found and if there's one, they're incredibly expensive, I can't have those batiks made into something usable or wearable. So, I had piles of batiks that I didn't know what I would do with.
なぜ私が裁縫をするようになったかというのは、なかなか難しいご質問です。私はハンドメイドのバティックが大好きで、それを見ると私は、たまらなくほしくなるのです。我慢できないんです!でも日本には、テーラーさんがいないのです。もしいたとしても、テーラーさんに頼むのはとてもお金がかかったりするので、これらのバティックを使えるようにしたり、着られるようにしたりするのは、とても難しいことなのです。ですから、私はたくさんのバティックのコレクションを持っていたとしても、それをどうやって使ったらいいのか、皆目見当がつきませんでした。
Suddenly I thought why not taking up sewing? Some people seem to have taught themselves to sew. They didn't go to any sewing schools. Plus there's plenty of sources where you get information on how to teach yourself to sew.
突然、私は思いつきました。自分でやったらいいんじゃない?世の中には裁縫を独学で学ぶ人もいます。彼らは裁縫学校へ行くわけではありません。それに今では、独学で裁縫を学ぶためのツールが、たくさんあります。
I mentioned the idea to my husband who thought that wasn't a bad idea at all.
私は旦那に相談しました。すると旦那は、それはいいアイディアだ、是非やってみるべきだよ、と言いました。
毎日私たちは近所の電気屋さんに行って、適当なミシンを探しました。でも私には、どんなミシンを買ったらよいのかも、全くわかりませんでした。すると旦那が実家へ帰って、ミシンを持ってきてくれました。それはお義母さんのミシンでした!彼女はそれを10年も前から持っていたのです。でもここ数年は、使われていませんでした。
次のステップは、裁縫の教則本探しです。だって私は、独学でやることに決めたのですから!でも自分にあったものを探すというのは、そんなに簡単ではありませんでした。なぜならどれが自分に合っているのか、その手がかりすらわからなかったからです。そんなわけで私は、こんな本とパターンブックを手に入れました。
And so I began my sewing adventure with batik :-)
こうして私の、バティックでの服作りの冒険が始まりました・・・。
Friday, 15 June 2012
Tempe (Part 1) 美味しいテンペの作り方
One of the interesting things about living overseas is that you start to value things that you take for granted in your home country.
海外で暮らすことの面白い点の一つは、自分の国で当たり前だと思っていた物事の価値を、改めて見直すことです。
Take an example: food. It's common when you are in your home country, you don't finish your meal (for being too full perhaps) and you just throw it away without feeling guilty (or just a little bit of it). There's plenty of this food in the country so we often don't think much before throwing it away. But when you're in a foreign country, this particular food is immensely valued for its rarity. You look for it, search, hunt..You pay a great amount of money for just a tiny amount of this food. Then you start to realize how valuable this food is..
例えば、食べ物。自分の国に住んでいれば、お腹がいっぱいになったなどの理由で食べ物を残したり、あるいは捨てたりすることに対して、申し訳ない、と感じたりすることは、あまりないかも知れません(あるいはあったとしても、ほんの少しだったりします)。自分の国にはこの食べ物はたくさんあるのだから、と、それを省みることは、あまりなかったりします。でも、もし外国に住んでいれば、この食べ物は、とても貴重になります。なぜならそれは、めったに見られない食べ物に変貌するからです。このちっぽけな食べ物を手に入れるのに、たくさんお金を払わなければならないかも知れません。そのとき初めて、この食べ物が貴重なものであったと、知ることになるのです。
In my case, it is TEMPE or TEMPEH.
私の場合、それはテンペでした。
This molded soy bean foodstuff is served almost daily at the dining table of almost every household in Indonesia. It's kind of like misoshiru to Japanese. We, Indonesian, eat tempe everyday. It's cooked in 1001 ways. Fried, steamed, stir-fried. Served it as part of daily meals or as snack.
この発酵豆食品であるテンペは、インドネシアではほとんど毎日のように、食卓に上るものです。日本の味噌汁みたいなものですね。私たちインドネシア人は、テンペを毎日食べます。1001通りもの調理の仕方があります。揚げたり、蒸したり、混ぜ合わせてからフライにしたり・・・。三度の食事の他に、おやつとしても食べられます。
In Indonesia, it doesn't cost much to buy tempe. Here, in Japan it costs me over several hundreds yen to get about 300 gr of tempe. It's like 10 times!!! Given the price, I treasure tempe like I never did before.
インドネシアでは、テンペはそんなに高くありません。でもここ日本では、300グラムのテンペを手に入れるのに、数百円以上かかったりします。約10倍です!こうしてテンペは、今の私にとって、宝物になってしまったのです。
I made the best of my visit to Tokyo last month by shopping at Toko Indonesia Okubo. It's a shop selling Indonesia's foodstuff and other South East Asian's. It's located near Okubo station, Tokyo. I bought 3 chunks of tempe. I was so happy!! It's like finding a treasure!
幸運にも先月、私は上京して、大久保にある『トコ・インドネシア』で買い物をしました。そこでは、インドネシアやその他の東南アジアの食材を、簡単に手に入れることができます。東京の大久保駅のすぐ近くですね。私はテンペを、3パック買いました。嬉しい!それは宝物を見つけたようなものでした。
How do I cook tempe?
さて、どうやってテンペを料理しようか?
This is the simplest way of cooking tempe: deep-frying it.
最も簡単なテンペの料理の仕方、それは、フライです。
I'm going to share this simple recipe. Easy and delicious!
それでは、レシピをご紹介しましょう。簡単でおいしいですよ!
Ingredients:
About 300 gr of tempe
1 clove of garlic ground
a teaspoon of coriander seeds
salt
water
<材料>
300グラムのテンペ
にんにく一片
コリアンダー小さじ一杯
塩
水
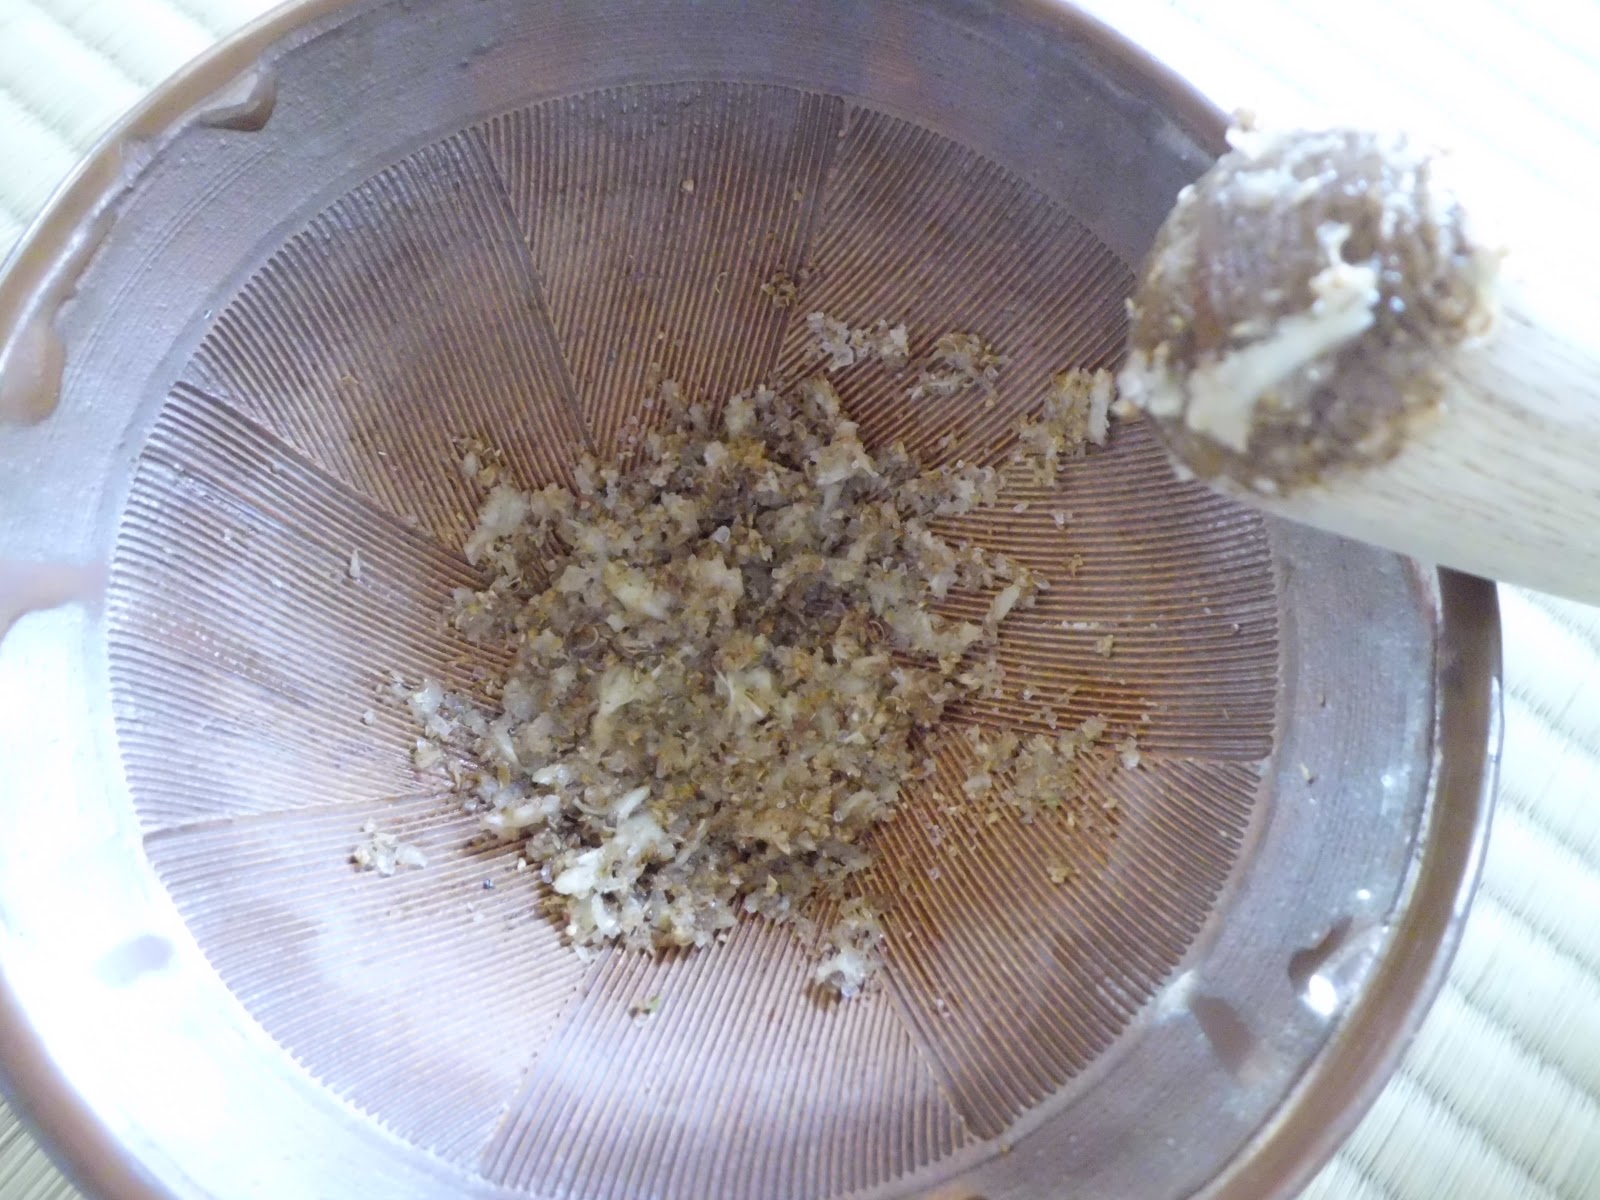
First peel the garlic, chopped and grind it using stone grinder if you have it. since I don't have a stone grinder either, I use goma suri. It looks like this.
まずにんにくの皮をむき、それを千切りにして、もしあれば石臼で挽きます。うちには石臼がないので、胡麻すりを使います。こんな感じです。
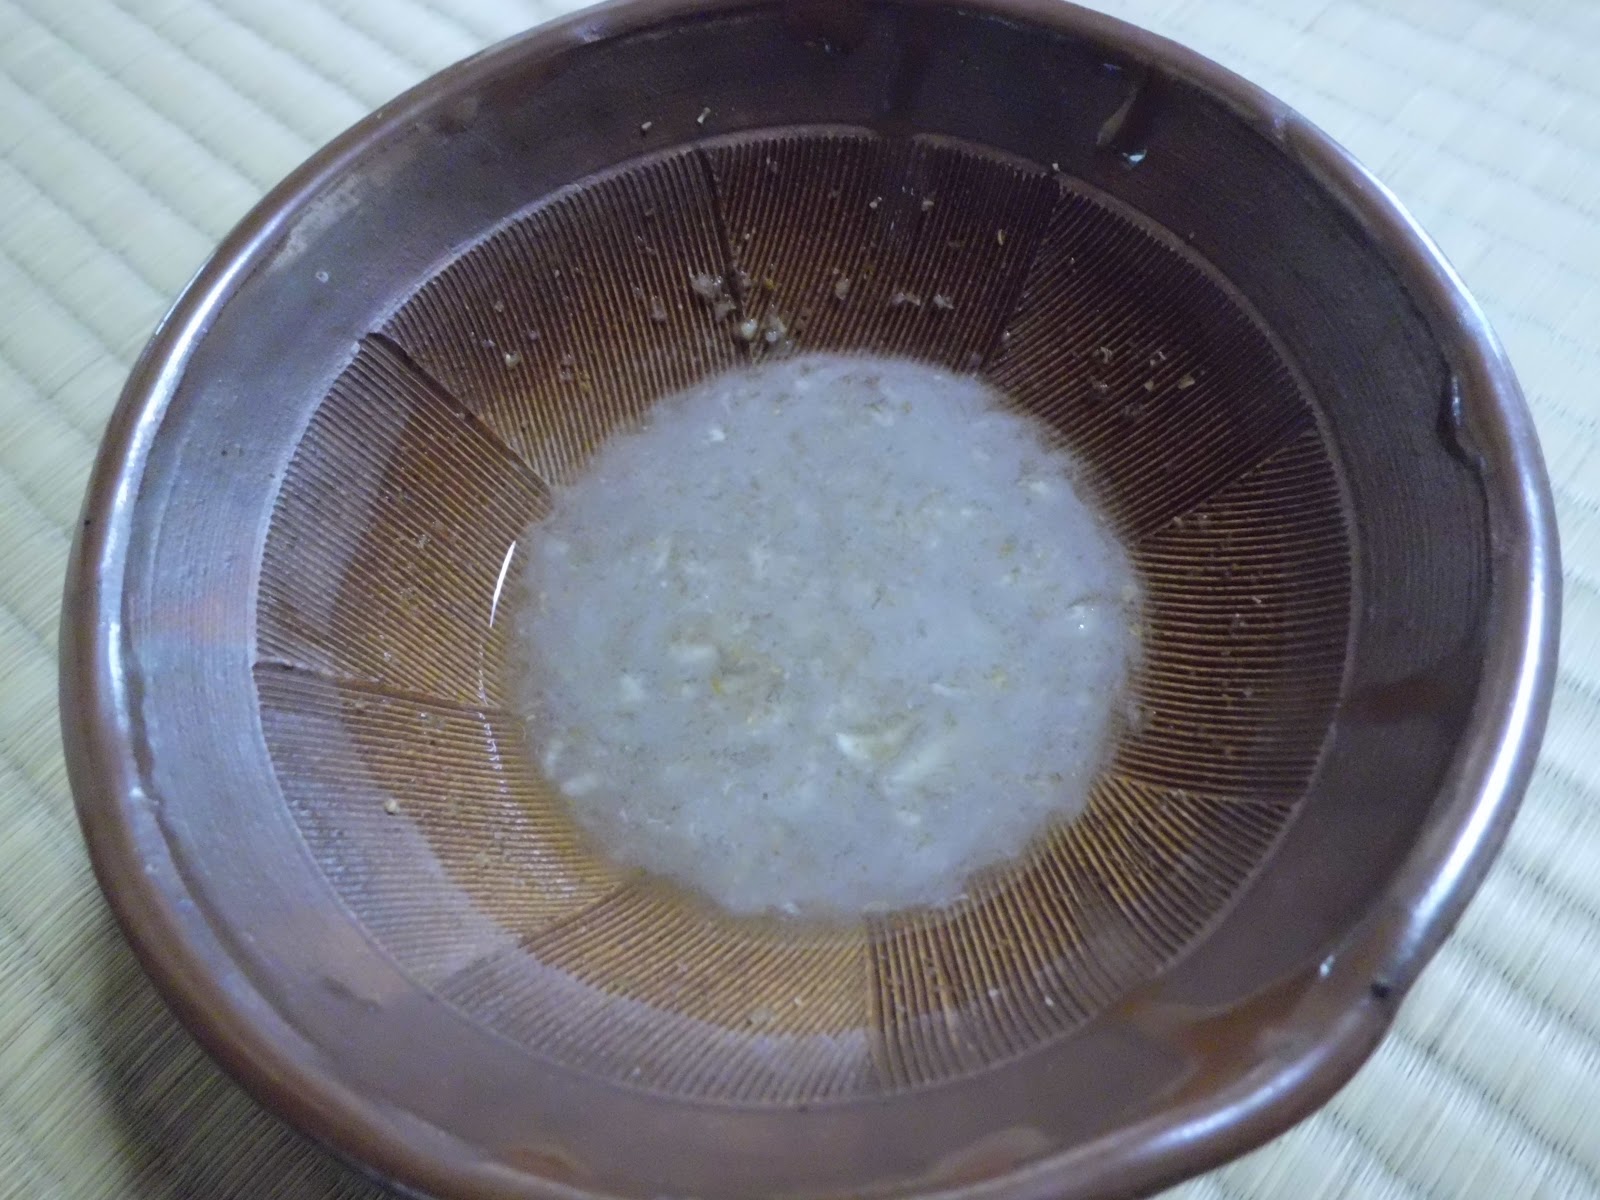
Then add some water.
次に水を加えます。
Now take the tempe.
さあ、テンペの出番です。
Slice the tempe thinly about 3 mm or as you like.
テンペを厚さ3ミリ程度に、あるいはお好みに合わせてスライスします。
After that marinate the slices of tempe in the mixture. And leave them for about 15 - 30 minutes depending how you like it. I like it with strong saltiness and coriander flavor. So I usually soak them for 30 minutes.
そしてそれを、マリネに漬けます。15分から30分、それもお好みです。私は少々塩味でコリアンダーの風味が効いている方が好みなので、大抵30分くらい漬けます。
Then what is left is frying it. Deep fry it until golden brown.
後はそれを、フライにするだけです。黄金色になるまで、しっかりフライします。
Prepare some oil paper sheets to absorb the oil. Put the fried tempe on the sheets.
油を吸収するペーパーを、あらかじめ用意しておいて下さい。そのシートに、テンペをのせます。
And finally the simplest fried tempe is ready. Served with piping hot rice. Yummmm!! Bon apetit! Itadakimasu! Selamat makan! :-)
ついにテンペ・フライの出来上がりです。熱いご飯と一緒に召し上がれ。うーん、おいしい!いただきます!
海外で暮らすことの面白い点の一つは、自分の国で当たり前だと思っていた物事の価値を、改めて見直すことです。
Take an example: food. It's common when you are in your home country, you don't finish your meal (for being too full perhaps) and you just throw it away without feeling guilty (or just a little bit of it). There's plenty of this food in the country so we often don't think much before throwing it away. But when you're in a foreign country, this particular food is immensely valued for its rarity. You look for it, search, hunt..You pay a great amount of money for just a tiny amount of this food. Then you start to realize how valuable this food is..
例えば、食べ物。自分の国に住んでいれば、お腹がいっぱいになったなどの理由で食べ物を残したり、あるいは捨てたりすることに対して、申し訳ない、と感じたりすることは、あまりないかも知れません(あるいはあったとしても、ほんの少しだったりします)。自分の国にはこの食べ物はたくさんあるのだから、と、それを省みることは、あまりなかったりします。でも、もし外国に住んでいれば、この食べ物は、とても貴重になります。なぜならそれは、めったに見られない食べ物に変貌するからです。このちっぽけな食べ物を手に入れるのに、たくさんお金を払わなければならないかも知れません。そのとき初めて、この食べ物が貴重なものであったと、知ることになるのです。
In my case, it is TEMPE or TEMPEH.
私の場合、それはテンペでした。
This molded soy bean foodstuff is served almost daily at the dining table of almost every household in Indonesia. It's kind of like misoshiru to Japanese. We, Indonesian, eat tempe everyday. It's cooked in 1001 ways. Fried, steamed, stir-fried. Served it as part of daily meals or as snack.
この発酵豆食品であるテンペは、インドネシアではほとんど毎日のように、食卓に上るものです。日本の味噌汁みたいなものですね。私たちインドネシア人は、テンペを毎日食べます。1001通りもの調理の仕方があります。揚げたり、蒸したり、混ぜ合わせてからフライにしたり・・・。三度の食事の他に、おやつとしても食べられます。
In Indonesia, it doesn't cost much to buy tempe. Here, in Japan it costs me over several hundreds yen to get about 300 gr of tempe. It's like 10 times!!! Given the price, I treasure tempe like I never did before.
インドネシアでは、テンペはそんなに高くありません。でもここ日本では、300グラムのテンペを手に入れるのに、数百円以上かかったりします。約10倍です!こうしてテンペは、今の私にとって、宝物になってしまったのです。
I made the best of my visit to Tokyo last month by shopping at Toko Indonesia Okubo. It's a shop selling Indonesia's foodstuff and other South East Asian's. It's located near Okubo station, Tokyo. I bought 3 chunks of tempe. I was so happy!! It's like finding a treasure!
幸運にも先月、私は上京して、大久保にある『トコ・インドネシア』で買い物をしました。そこでは、インドネシアやその他の東南アジアの食材を、簡単に手に入れることができます。東京の大久保駅のすぐ近くですね。私はテンペを、3パック買いました。嬉しい!それは宝物を見つけたようなものでした。
How do I cook tempe?
さて、どうやってテンペを料理しようか?
This is the simplest way of cooking tempe: deep-frying it.
最も簡単なテンペの料理の仕方、それは、フライです。
I'm going to share this simple recipe. Easy and delicious!
それでは、レシピをご紹介しましょう。簡単でおいしいですよ!
Ingredients:
About 300 gr of tempe
1 clove of garlic ground
a teaspoon of coriander seeds
salt
water
<材料>
300グラムのテンペ
にんにく一片
コリアンダー小さじ一杯
塩
水
First peel the garlic, chopped and grind it using stone grinder if you have it. since I don't have a stone grinder either, I use goma suri. It looks like this.
まずにんにくの皮をむき、それを千切りにして、もしあれば石臼で挽きます。うちには石臼がないので、胡麻すりを使います。こんな感じです。
| Garlic, coriander seeds and salt are ground into paste. にんにく、コリアンダー、塩をペースト状にします |
Then add some water.
次に水を加えます。
| It will look like this. こんな感じ。 |
さあ、テンペの出番です。
| The spongy cottony tempe. This is about 300 gr. スポンジみたいにやわらかいテンペ。これで300グラム程度です。 |
テンペを厚さ3ミリ程度に、あるいはお好みに合わせてスライスします。
| As you cut it, the tempe reveals its soy beans. テンペを切ると、大豆が現れます。 |
そしてそれを、マリネに漬けます。15分から30分、それもお好みです。私は少々塩味でコリアンダーの風味が効いている方が好みなので、大抵30分くらい漬けます。
| Marinated. 漬けるとこんな感じ。 |
後はそれを、フライにするだけです。黄金色になるまで、しっかりフライします。
Prepare some oil paper sheets to absorb the oil. Put the fried tempe on the sheets.
油を吸収するペーパーを、あらかじめ用意しておいて下さい。そのシートに、テンペをのせます。
And finally the simplest fried tempe is ready. Served with piping hot rice. Yummmm!! Bon apetit! Itadakimasu! Selamat makan! :-)
ついにテンペ・フライの出来上がりです。熱いご飯と一緒に召し上がれ。うーん、おいしい!いただきます!
| The simplest way to enjoy tempe ^o^ テンペ楽しむ簡単なやり方! |

Sunday, 10 June 2012
Exhibition at DO Boutique Tokyo ブティックDoさんでの展示会
We thank DO Boutique, Tokyo for their generosity in hosting a small exhibition for our batik items. It was a great pleasure to know that batik is accepted in Japan.
東京のブティックDoさんのおかげで、バティックの小さな展示会を開くことが出来ました。日本でバティックが受け入れられて、とても嬉しいです。
We hope that we're able to do another exhibition soon in Tokyo or other places in Japan or in other parts of the world!
また東京で近いうちに展示会を開きたいです。あるいは他の場所でも、そして世界でも!
東京のブティックDoさんのおかげで、バティックの小さな展示会を開くことが出来ました。日本でバティックが受け入れられて、とても嬉しいです。
| The window display and announcement. ディスプレイと紹介 |
| One corner where they displayed our batiks. うちのバティックが紹介されているコーナー |
| Batiks and batik silk shawls. バティックの生地とショール |
| Batik tunic and silk batik shawl. バティックのチュニックとショール |
| A piece of hand-drawn batik at another corner. 手描きバティックが紹介されているコーナー |
| Choosing a silk batik scarf. シルクのバティックのスカーフをお選びのところ |
また東京で近いうちに展示会を開きたいです。あるいは他の場所でも、そして世界でも!
Subscribe to:
Posts (Atom)