Saturday, 8 November 2014

Tsumami Zaiku / Kanzashi Petals on Fabric Covered Buttons

Button is one of my favorite item in the craft world, especially fabric covered button.

I've been fascinated by cute fabric covered buttons and how versatile they are. The range of their versatility is amazing: from hair accessories to jewelry. The projects that you can do with fabric covered buttons are countless!

I was browsing the net and found this: tsumami zaiku on a fabric covered button.  What a great idea to combine fabric covered buttons with tsumami zaiku.

To make the fabric covered buttons I use two types of covered buttons: the metal ones and the plastic ones. The plastic ones are known as kurumi buttons. The difference is that kurumi buttons don't have metal backs. Kurumi buttons are used to create projects such as small coin case.


When I use kurumi buttons in my tsumami zaiku projects, I have to create a base made of cardboard which I attach on the back of the kurumi button. When I use the metal buttons, I don't have to do that.

I will write about how to make it. But briefly, it's pretty easy. Cover both the metal top and the back with a piece of fabric. On the back attach 2 pieces braided elastic crisscrossing each other. Then attach the back on with strong glue. Leave it for a couple of hours. When set, it's ready to be decorated with tsumami zaiku flower or petals.

This can be attached and detached. Attach it on a hair clip, headband, brooch, or even a choker ribbon to make is as choker pendant.


This my first batch of fabric covered buttons with tsumami zaiku. Some of these are available on my Etsy shop.

Wednesday, 5 November 2014

Vegan/Vegetarian Tofu Spinach Potstickers

It's been ages since I wrote the tempe recipe.

I've been an on-and-off vegetarian since I moved to Japan. I was a vegetarian back in my home country in Indonesia. But in Japan, I found it a bit hard to become a vegetarian. Mainly because the vegetable protein is quite expensive in comparison to that in Indonesia. For example tempeh. I always love tempeh and used to eat that on daily basis in Indonesia but in Japan, it's kind of luxurious.

Fortunately there thousands of vegan/vegetarian recipes on the net, which I can easily adjust and improvise. One of them is tofu spinach potstickers.

I've always loved potstickers! Can't get enough of them. I just LOVE dumplings.

I've been making different types of potstickers or dumplings. My most favorite ingredients for the filling are shitake mushroom, cabbage, and tofu. Sometimes I use the inggredients alternately e.g. mushroom and cabbage, mushroom and tofu, cabbage and tofu.

I just got a lot of vegetables from my mother in-law. I got carrots, broccoli, Chinese cabbage, and many more. I also got some spinach. I always get home with a lot of vegetables whenever my husband and I pay a visit to my parents in-law for dinner.

Anyway, I was going to make tofu cabbage potstickers when I saw the horenzo or Japanese spinach in the kitchen. I thought why not making tofu spinach potstickers?
I got this recipe TOFU and SPINACH Potstickers.
But I made some changes in the recipe. I didn't use frozen but fresh spinach. I also didn't add soy sauce, scallions, or Worcestershire sauce. I also didn't prepare any sauce. My husband and I seldom need dipping when we eat potstickers.

So this is the recipe. The filling is just enough for maybe 34 - 40 potstikers depending on the size of your wonton skin. I have difficulty guessing how much ginger needed as some people might LOVE ginger and some might not so. So you can always add the amount of ginger according to your taste. And another difference is that I add ground sesame instead of sesame oil.

Ingredients:
400 gr (14  ounces) of firm tofu crumbled (if the tofu is not firm enough, you can get the water out by wrapping the tofu in a cloth and press)
200 gr (7 ounces) of chopped spinach
2 cloves of garlic, finely chopped
1" ginger, finely chopped
1 - 2 tablespoons of flour
1 - 2 teaspoons of ground sesame
1.5 teaspoons of salt. (or 1 teaspoon if you want to eat the potstickers with dipping sauce.
Wonton skins

1. Mix well all the ingredients.
2. Stuff the wonton skins with the filling. Check here on how to wrap the filling. Wonderful and easy technique.


3. Prepare a skillet and add a little oil and fry the potstickers. Don't let potstickers burn (though I sometimes do ha ha ha). Just fry until they're slightly brown on each side.

Now the potstickers are ready!Sorry for the not-so-good photo! But the taste is yummy!


Saturday, 25 October 2014

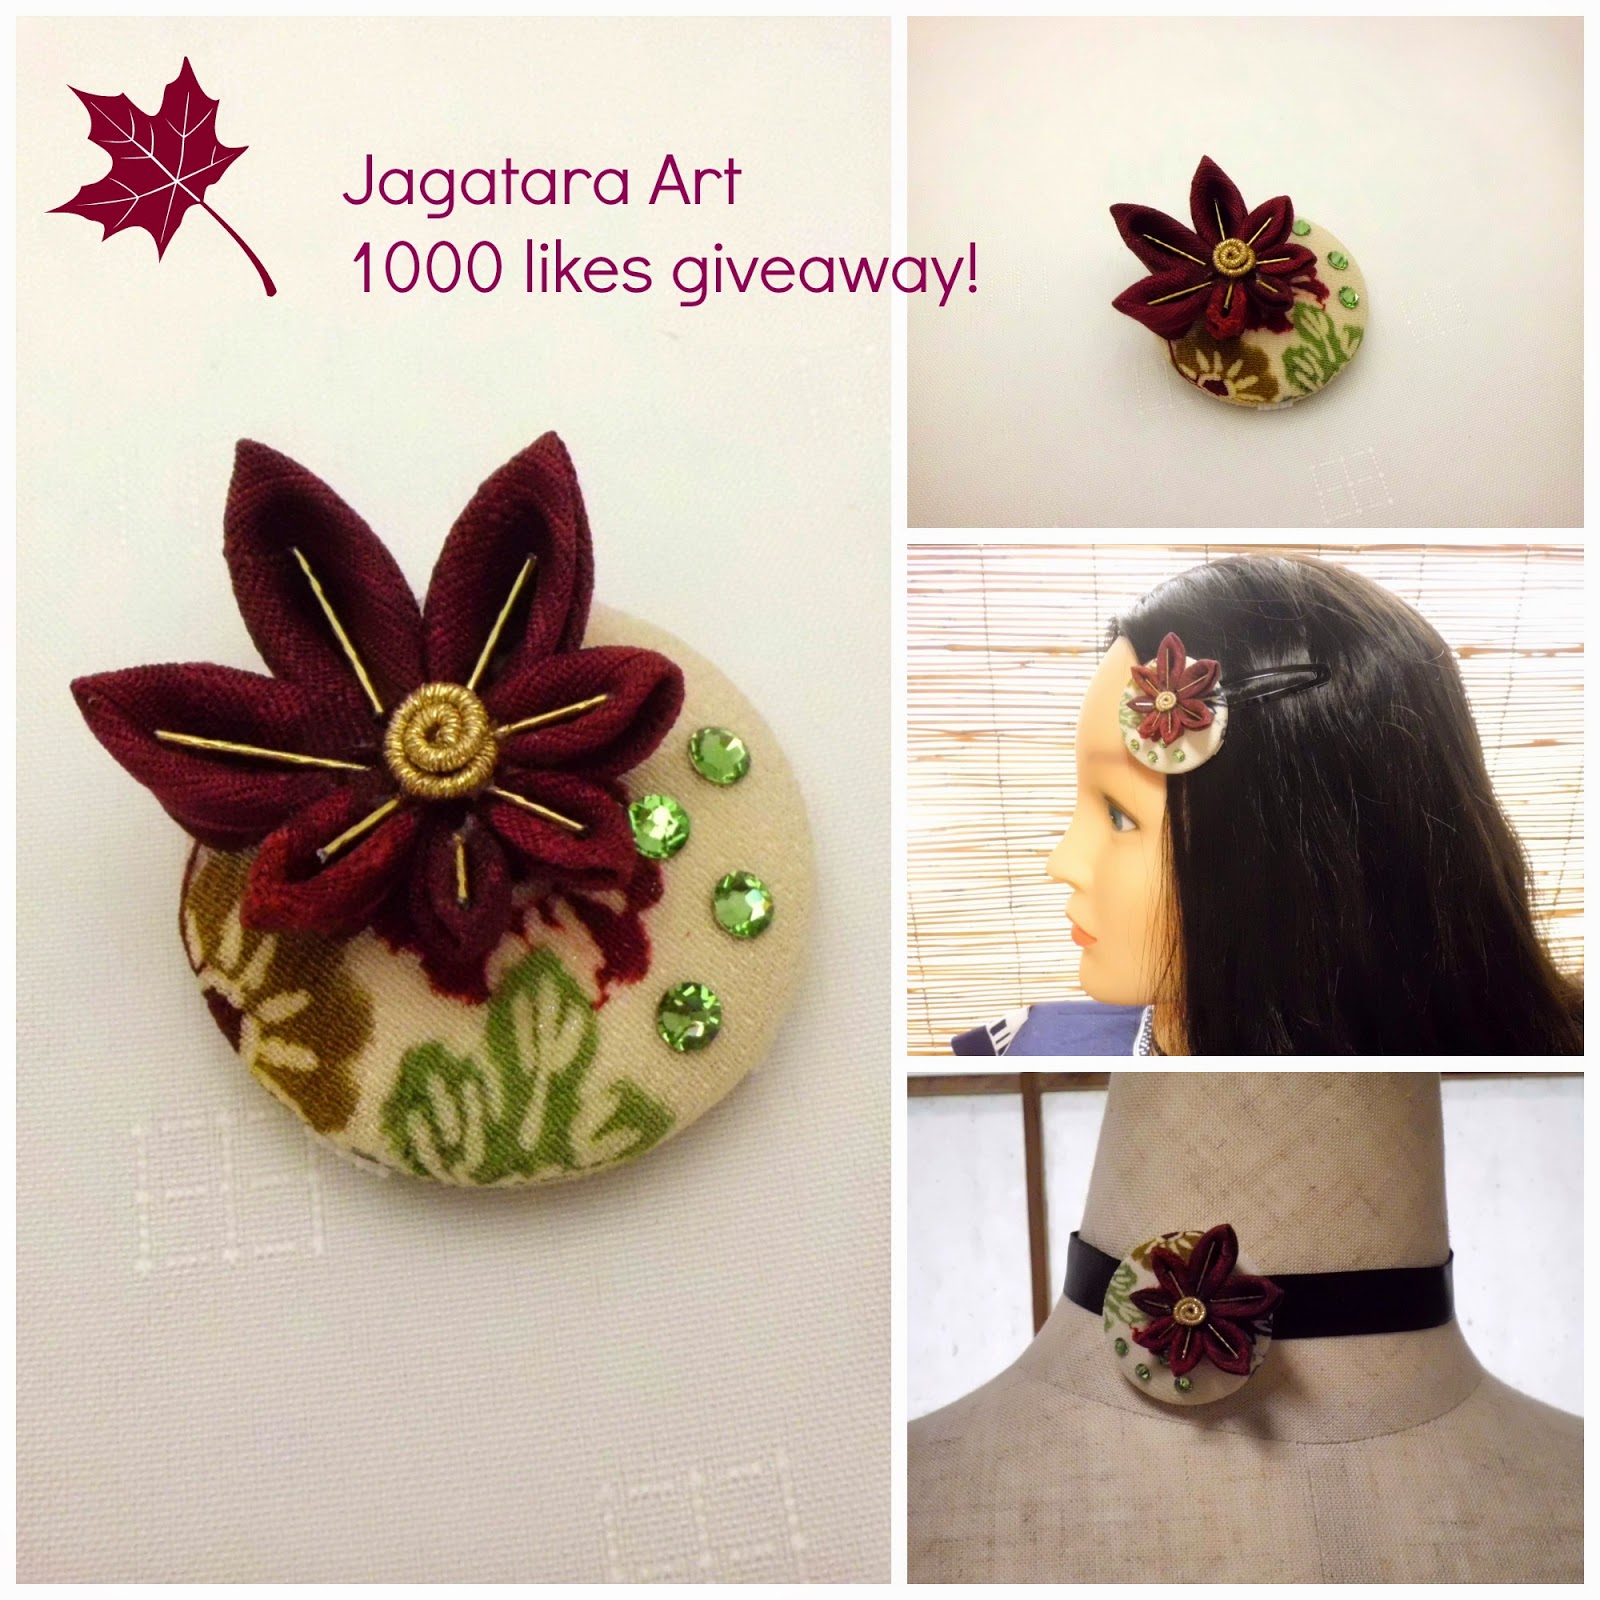
1000 LIKES on my facebook page GIVEAWAY!!

I checked my facebook page Jagatara Art and found out that it had gained over 1000 likes!!

For my dear fans who have come and liked my page, I'm throwing a giveaway to celebrate 1000 likes!

I have two fabric covered buttons to give away. Fabric covered buttons are very versatile. You can attach them on a snap clip, brooch, headband or even on ribbon as a choker. There are lots of ways how you can wear ones.

How to win one of these two fabric covered buttons:

1. You can only choose 1 item. So please click one of the picture and comment.    For example: I'd like this one.
2. Share the picture of the item that you want to win as many as you can.
3. The sharing will close on 27th October 00:00 Japan time or 14:00 GMT
4. I will announce the the winners on 28th October (Tuesday).


Go to my Facebook fanpage Jagatara Art to enter the giveaway ^^

Thursday, 16 October 2014

Bell Flower Hair Comb Bridal Headpiece

I thought I could get back to write a new post right after "Morning Glory Hair Comb.." post. But there were always things to do. So it was delayed for longer time.

September is the month of bell flower or kikyou in kanzashi calendar. Last month, I managed to make two bell flower themed bridal kanzashi. Therefore, I had three bell flower themed on my Etsy shop.

The first one is a triple bell flower in soft colors: lavender, mint blue and soft lilac. I made these flowers out of vintage kimono I had got from various resources. As for the leaves, I used hand-dyed light weight silk from Nuno Felting Silk.


The second bouquet is slightly larger with smaller flowers. I used Indonesian woven silk and vintage kimono lining for the flowers and habutai silk for the leaves.
  

Blue bell flower bouquet bridal headpiece

The later one is made of batik cotton. I like the combination of cream and peach colors.


Unlike the two above, this is a hair stick or hair prong. This peach cream colored bell flower bouquet is nice to adorn a hair bun.

Tuesday, 30 September 2014

Morning Glory Bridal Hair Comb or Headpiece Kanzashi

Summer is over and autumn is here.. :)

I have to admit that I don't like summer. It's so humid and hot. I feel as if my energy was absorbed out of my body, leaving me lethargic and inactive. That's why I didn't post at all during summer. Sorry about that..

Apart from being lethargic, I managed to make some seasonal kanzashi in August and September.

August is the month of morning glory. Morning glory or asagao has hardly ever been assembled with other flowers in a kanzashi. As far as I know. For this year's morning glory, I made two hair combs in very elegant colors of teal and blue. I acquired the silk from an Etsy shop called nunofeltingsupplies. The silk was hand-dyed with so beautiful shades of blue and teal. It was also very light, making the morning glory I made very soft and elegant.

https://www.etsy.com/transaction/225053235
For this hair comb, I used two colors, blue and purple. I added a tendril as the signature of Morning glory kanzashi :)

The teal morning glory on this hair comb are rather smaller than the previous. But I think they're really cute and elegant. This will make an elegant bridal hair comb or headpiece.

I wanted to write about bell flower in this post, but I can't keep my eyes open ha ha ha.. So I'll write about that in my next post. Soon. I promise :)

Monday, 14 July 2014

Yummy Looking Tsumami Kanzashi Hair Stick with Sagari Dangles

I was told my some friends who saw these pieces on my Facebook wall that they looked like soft candies or marshmallows or maybe cotton candy!

I did pick the colors for the kanzashi very carefully when planning. I wanted the bouquets exude softness, elegance, and innocence. Though I had never expected that they could look edible :)
 
For this kanzashi, I combined yellow lemon and pink with a slight touch of mauve. I named this piece Lemon Chiffon Toned Tsumami Kanzashi Hair Stick. Very sweet and soft. I made this from vintage kimono and batik. The hair stick can be worn with or without sagari dangles.


The second one has more maturity. For Lavender Mint Blue Tsumami Kanzashi Hair Stick, I combined soft lavender, mint blue with a touch of mulberry purple. I used vintage kimono and Indian saree silk.


Wednesday, 25 June 2014

Wisteria Inspired Bridal Hair Stick

Wisteria season is over but the creation of kanzashi doesn't have to follow what is in season, right?

I actually made these hair sticks last month (May). But I was too busy to post on my blog.

I'd checked hundreds of wisteria designs when planning to make these hair sticks. But most of them looked too glamourous. They're all gorgeous and fantastic. But I wanted to make a wisteria inspired hair stick which was simple and consequently wouldn't look showy.

As additional adornment, I added glass beads such as fire-polished glass beads trailing down each of the wisteria stalk.

As for fabrics, I chose vintage kimono and Indian saree silk. Lavender and white bridal wisteria hair sticks are made from vintage kimono both for the flower petals and the leaves. I used Indian saree silk for the turquoise and dusty blue wisteria.


 Indian saree dusty blue wisteria.


Indian saree turquoise wisteria.


Vintage kimono white bridal wisteria.


Vintage kimono lavender wisteria.


Sunday, 25 May 2014

Tsumami Kanzashi Tutorial

I've been meaning to post a tutorial on how to make tsumami kanzashi or tsumami zaiku, but I never got around to it. Or I just simple need to do something for my time management. Hubby says that I'm awful at managing the time :D

Well, the thing was that I couldn't make kanzashi and take pictures at the same time. That's just impossible. So a few weeks ago, I had my husband take some pictures while I was making. And he was happily taking some ^_^

At that time I was making a small kanzashi hair comb consisting of 3 flowers with a sagari dangle.
https://www.etsy.com/listing/190457666/scarlet-triple-flowers-tsumami-kanzashi


I'm sorry that this tutorial only covers how to make one flower and not the overall arrangement. However, I hope this will give you an idea to try this by yourself.

First of all, the supplies:
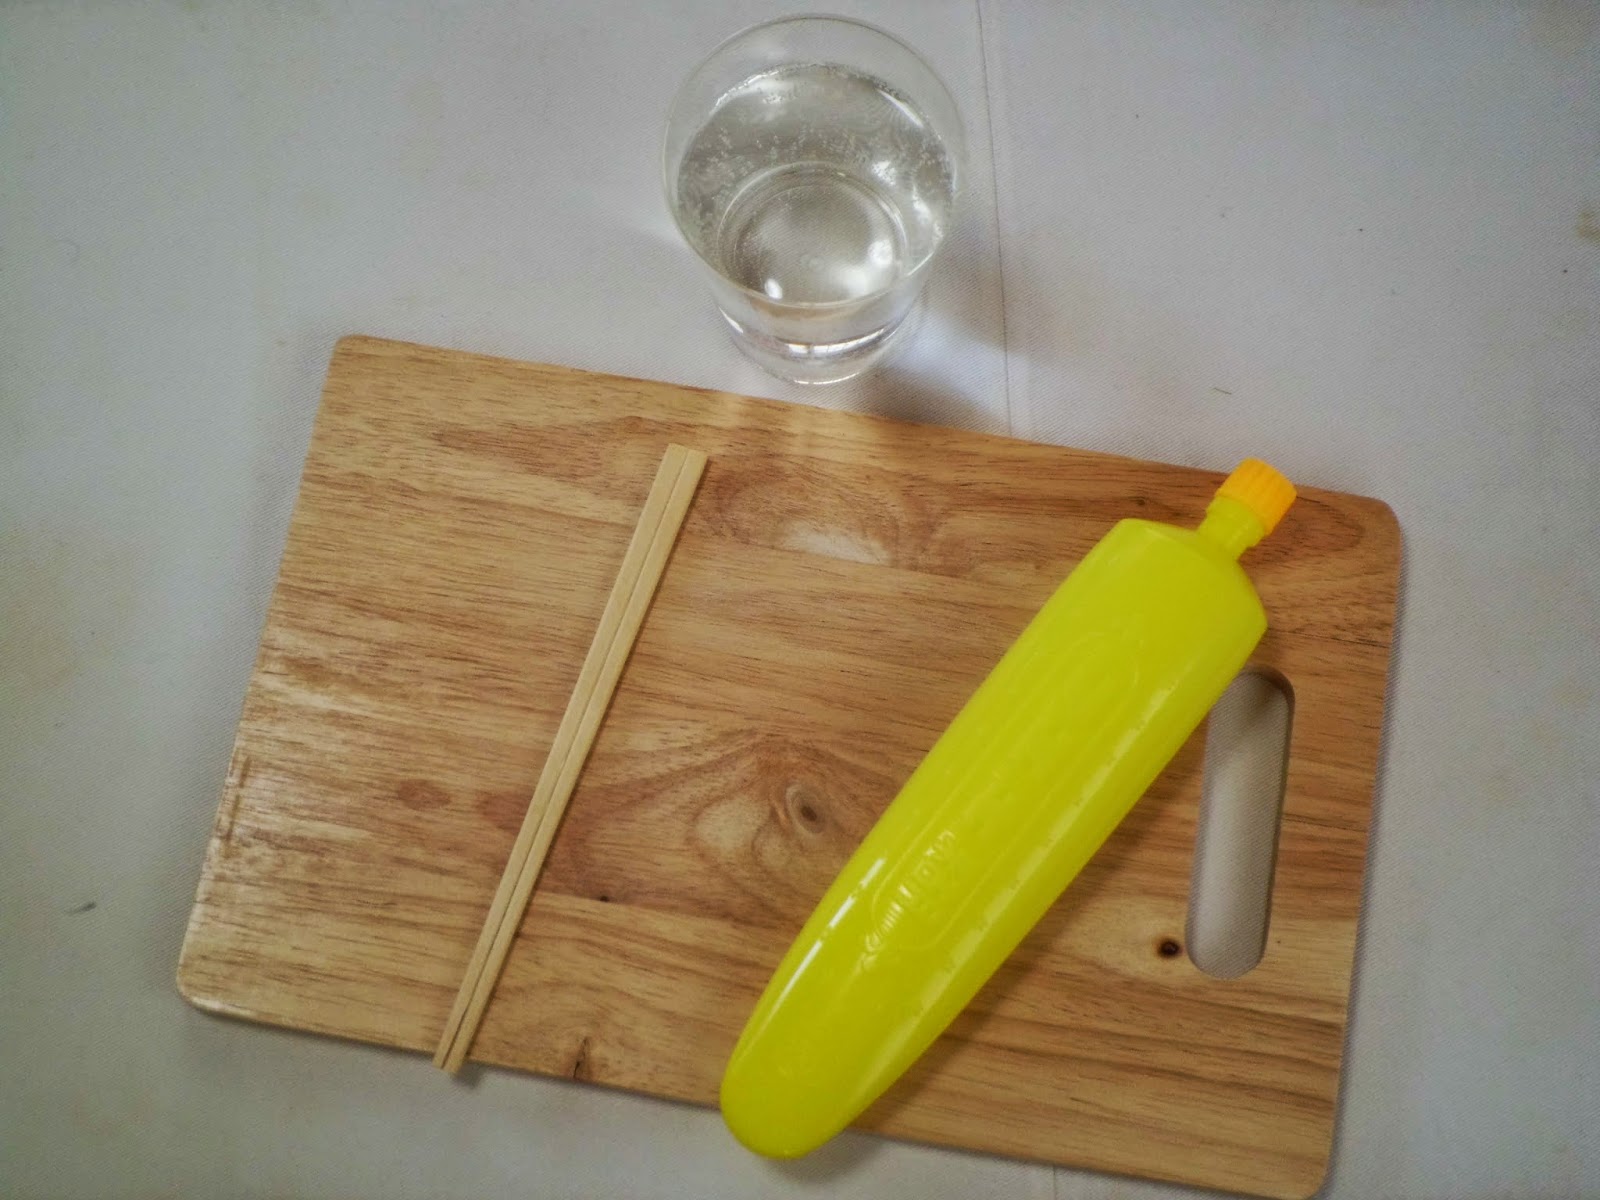
You need some rice glue paste or denpun nori in Japanese. It's easy to find in stationary shops or craft supply shops in Japan. However, if you live in a country where denpun nori is not available, you can try making your own rice glue paste. This is the link to how to make it: How to make rice glue. Then you'll need a wooden board to spread the glue on. Be resourceful. You don't need a special kanzashi wooden board. Just a wooden board with smooth surface. In my case, I bought my wooden board at a 100 yen shop. It cost me 200 yen or about $2. It's actually a cutting board :) but it works just as well. Also to spread the glue, I just use an unsplit pair of chopsticks. Dip the pair chopsticks (or spatula or anything that works the same) into the water before using it to spread the glue.


Now that you have spread the glue on the board, you can prepare the squares.

You'll need a piece of fabric. Usually and traditionally, kanzashi crafters use habotai silk or China silk and hand dye it. But I choose to use scraps. The reason is simple: to reduce waste. I'm trying to be as eco-friendly as possible and besides I have tons of batik scraps and vintage kimonos that my mother in-law happily donates to me from time to time. So, this time I choose a lining from a vintage kimono. Before I cut it into squares, I starched it using spray starch and ironed it.

Then I cut 15 squares out of it. Each square is about 2.3 cm (a bit less than 1 inch I think).

Next, start to fold the squares. For the flowers I make round petals. Fold the square in half diagonally. Then  fold the right hand corner to meet the bottom corner and do the same with the left hand corner. And then fold the whole piece in half. Most kanzashi crafters hold along the bottom side, but I prefer to hold the corner where all corners meet. Which one is better depends on how comfortable you hold the piece. Finally, put the petal on the glue. Use tweezers to hold the petals.


To make the leaves, I make pointed petals. The first step is similar to the round petal. Fold the square in half and fold again in half. Again you may grip the petal alongside the bottom or just like I do, only the corner where all corners meet. Finally, place the petal on the glue.


Now, you make the bases. To make a base, cut a round cardboard. Since the square is 2.3 cm, I cut a round cardboard which is 1.5 cm in diameter. Cut also a piece of fabric in circle, slightly larger than the round cardboard, maybe 2 cm or 2.2 in diameter.


Next, pierce a hole in the center of the round cardboard and the round fabric. Take a floral wire and make a small hook on one end. Slide the wire into the hole of the cardboard and the fabric. With a dab of glue, cover the cardboard with the fabric. Prepare also some cut floral stamens for decoration.


Now, you're ready to assemble the petals. Again, most kanzashi crafters grip the bottom of the petal, while I prefer to hold just the corner. When you've finished placing 5 petals on the base, tidy them and remove the excess of glue gently with tweezers.  Note: prepare a wet towel to clean the tweezers off the glue. Sticky tweezers make it difficult for your to arrange the petals. So, wipe them frequently while you're assembling the petals.


When you're done assembling the petals. Leave the flowers for a couple of hours to let the glue dry before you add other decorations or attach them to a hair clip / hair comb / hair stick. It's hard to determine exactly how many hours, since it depends on the climate and weather in your place. In my case, in winter it takes me 2 or 3 days. In summer it takes only 3 - 6 hours.


When the glue has dried, now you're ready to attach them. Tie the flowers into one bundle with a string. Then attach the bundle on a hair comb or a hair stick with string. You can add other decorations if you like.

There you have your kanzashi flower.